Medical Emergencies and Unexpected Responses
Not sure you’re ready?
Take the ~3-minute readiness diagnostic and see where you stand.
Welcome to the study of Medical Emergencies and Unexpected Responses! Think about the human body for a moment. It is an exquisitely tuned machine, a symphony of electrical impulses, fluid dynamics, and pressure gradients. But what happens when the machine crashes? What happens when a therapy we introduce suddenly throws the entire system into chaos?
As a Practical Nurse, you are the front line. When an emergency strikes, you don’t have time to leisurely flip through a textbook. You need to understand the mechanics of the emergency so deeply, so intuitively, that your hands know exactly what to do before your conscious mind even registers the panic in the room.
In this guide, we aren't just going to memorize steps. We are going to look under the hood. We are going to understand why the rules are what they are. Let’s dive right into the physics, the plumbing, and the pharmacology of saving a life.
When a client goes into cardiac arrest, the body's main mechanical pump has failed. Your job is beautifully simple but physically demanding: you must become the pump.
The Sequence of Survival: Think CAB
For decades, medical professionals were taught the "ABC" (Airway, Breathing, Compressions) sequence. But we realized something fundamental about physiology. When the heart stops, the blood sitting in the vessels already holds several minutes worth of oxygen. If we waste time fiddling with the airway first, that oxygenated blood just sits there, useless, while the brain starves.
Therefore, the sequence for basic life support prioritizes chest compressions followed by airway management and breathing. This is the CAB sequence (Compressions, Airway, Breathing). Move the blood first; ventilate second.
The Mechanics of the Pump: Compressions
Before you start pumping, you must verify the pump has actually stopped.
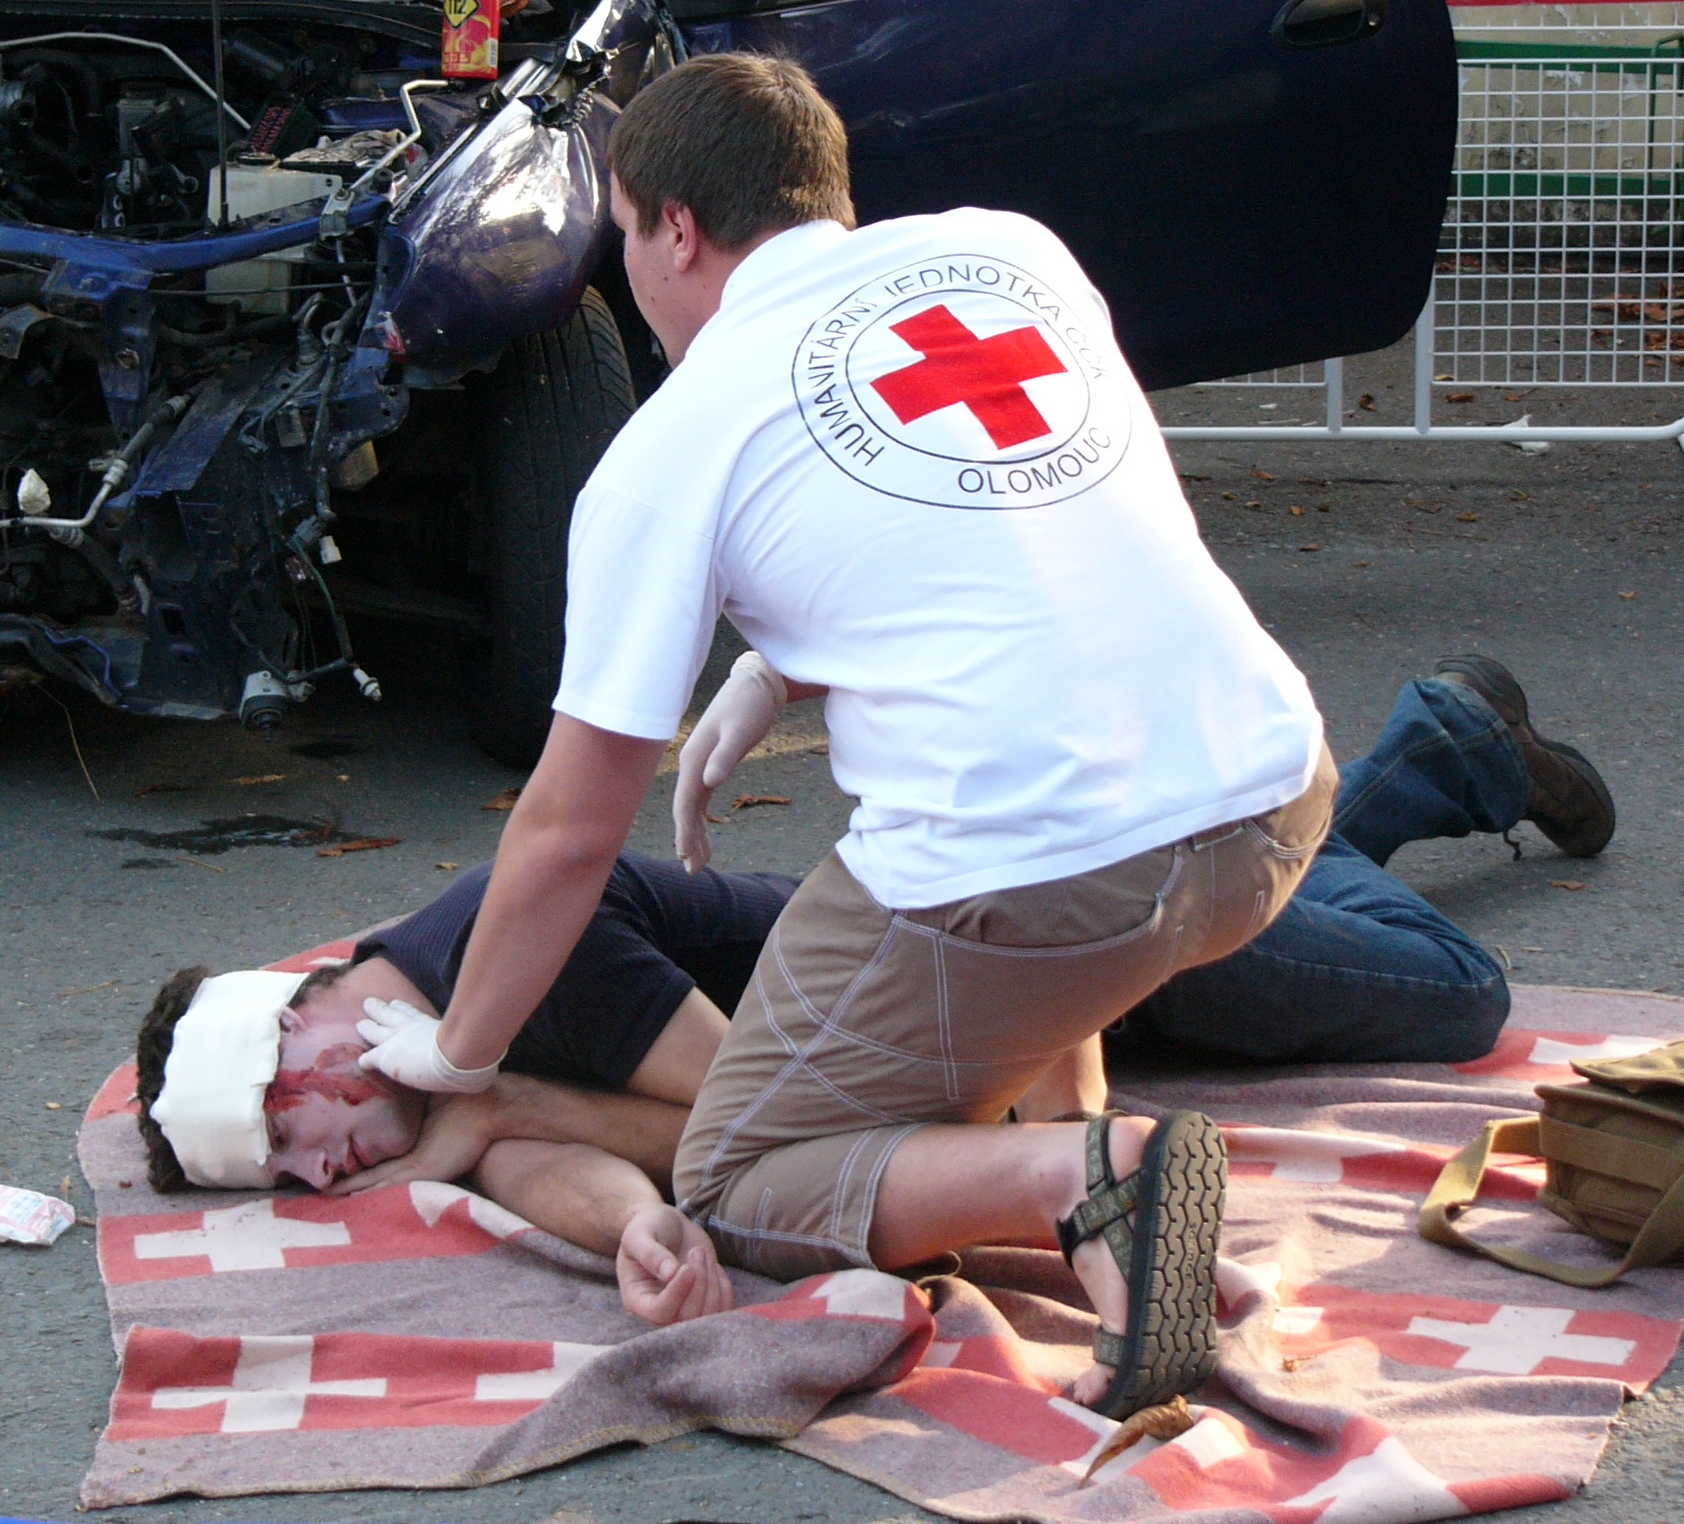
- Adults: Healthcare providers must check the carotid pulse for no more than ten seconds before starting adult chest compressions. Why a ten-second limit? Because every second you spend hunting for a faint pulse is a second the brain is dying. If you aren't sure you feel a pulse in ten seconds, start compressing!
- Infants: Infant anatomy is different. Their short, chubby necks make the carotid pulse nearly impossible to find quickly. Thus, the brachial artery is the preferred site to check for a pulse in an infant during a life-threatening emergency.
Once you begin, you must compress with the correct rhythm and force:
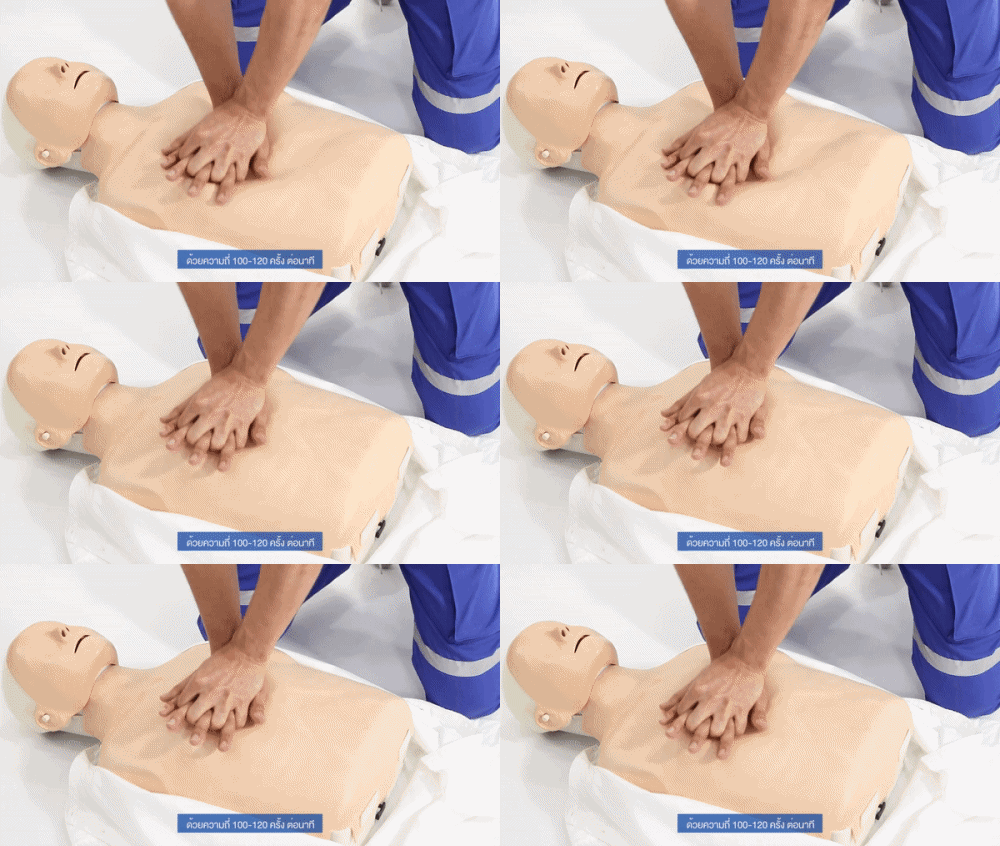
- Rate: The recommended chest compression rate for adult basic life support is 100 to 120 compressions per minute. Think of the beat of the song Stayin' Alive. Go too slow, and you don't build enough pressure to push blood to the brain. Go too fast, and the heart chamber doesn't have time to fill back up with blood between strokes.
- Depth: The recommended chest compression depth for adult basic life support is at least two inches. You are manually squeezing the heart between the sternum and the spine. A superficial tap won't do it.
- Recoil: Rescuers must allow for complete chest recoil between each chest compression during basic life support. This is the most common mistake! Pushing down pushes the blood out, but letting up—completely—creates the negative pressure vacuum that pulls fresh blood back into the heart. If you lean on the chest, the pump can't refill.
The Electrical Reset: Defibrillation
Sometimes the heart hasn't stopped completely; instead, the electrical circuitry has gone haywire, causing the heart muscle to quiver uselessly. We call this ventricular fibrillation (V-fib).
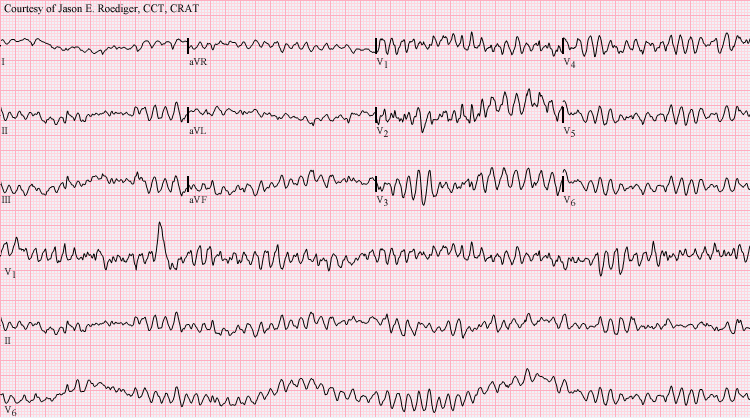
How do we fix it? We don't "jump-start" the heart as movies suggest. We actually stop it. Early defibrillation using an automated external defibrillator (AED) interrupts ventricular fibrillation to restore a normal heart rhythm. The shock acts like a massive "Control-Alt-Delete," completely halting the chaotic electrical storm for a fraction of a second, allowing the heart's natural pacemaker (the SA node) to step back up and take control.
The Clogged Pipe: Airway Obstruction
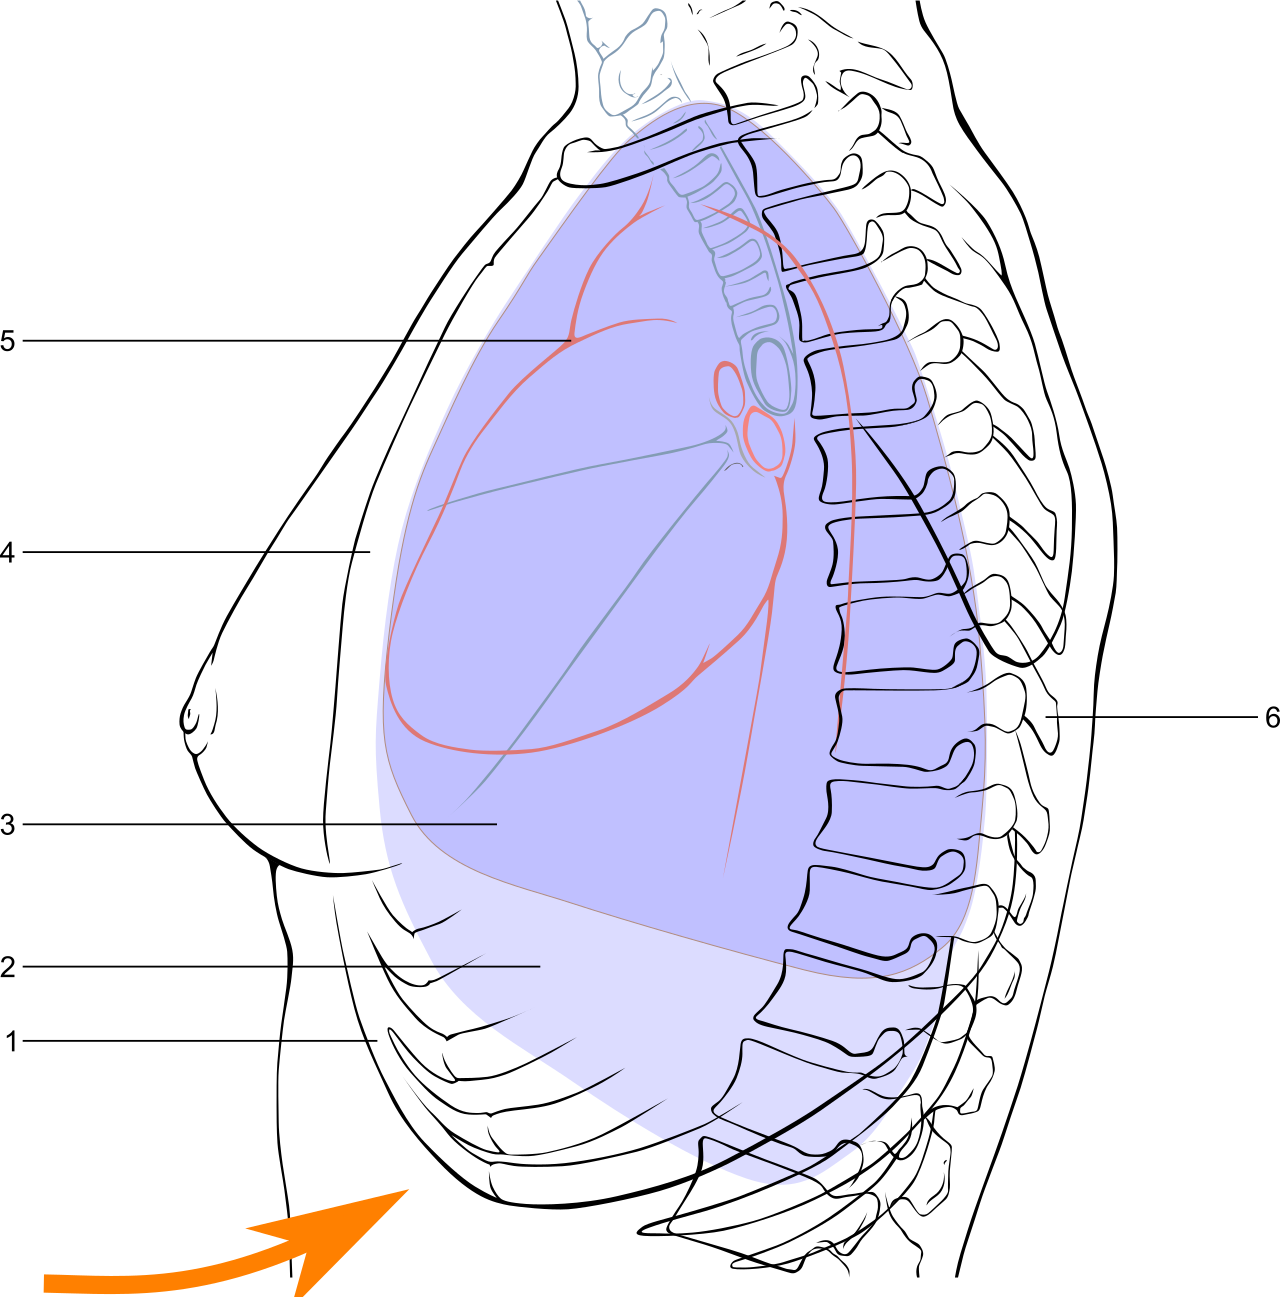
What if the heart is fine, but the main intake pipe is completely blocked? Severe upper airway obstructions require rapid upward abdominal thrusts known as the Heimlich maneuver. Think of the lungs as two big plastic bags of air. By forcefully pushing inward and upward on the diaphragm, you rapidly decrease the volume of the chest cavity, sharply spiking the pressure inside the lungs. This pressure acts exactly like popping a cork out of a champagne bottle, propelling the obstruction out of the airway.
Surgery is controlled trauma. We cut the body open, fix a problem, and sew it back together, trusting the body's natural glue (collagen and fibrin) to hold the seams. But sometimes, physical tension overcomes that biological glue.
Dehiscence vs. Evisceration
Let's define our terms precisely:
- Wound dehiscence is the partial or total separation of previously approximated surgical wound edges. The stitches "popped." The wound is open, but the organs are still inside.
- Wound evisceration is the protrusion of internal organs through an open surgical incision. This is a true, life-threatening emergency. The barrier is gone, and the internal plumbing is spilling out.
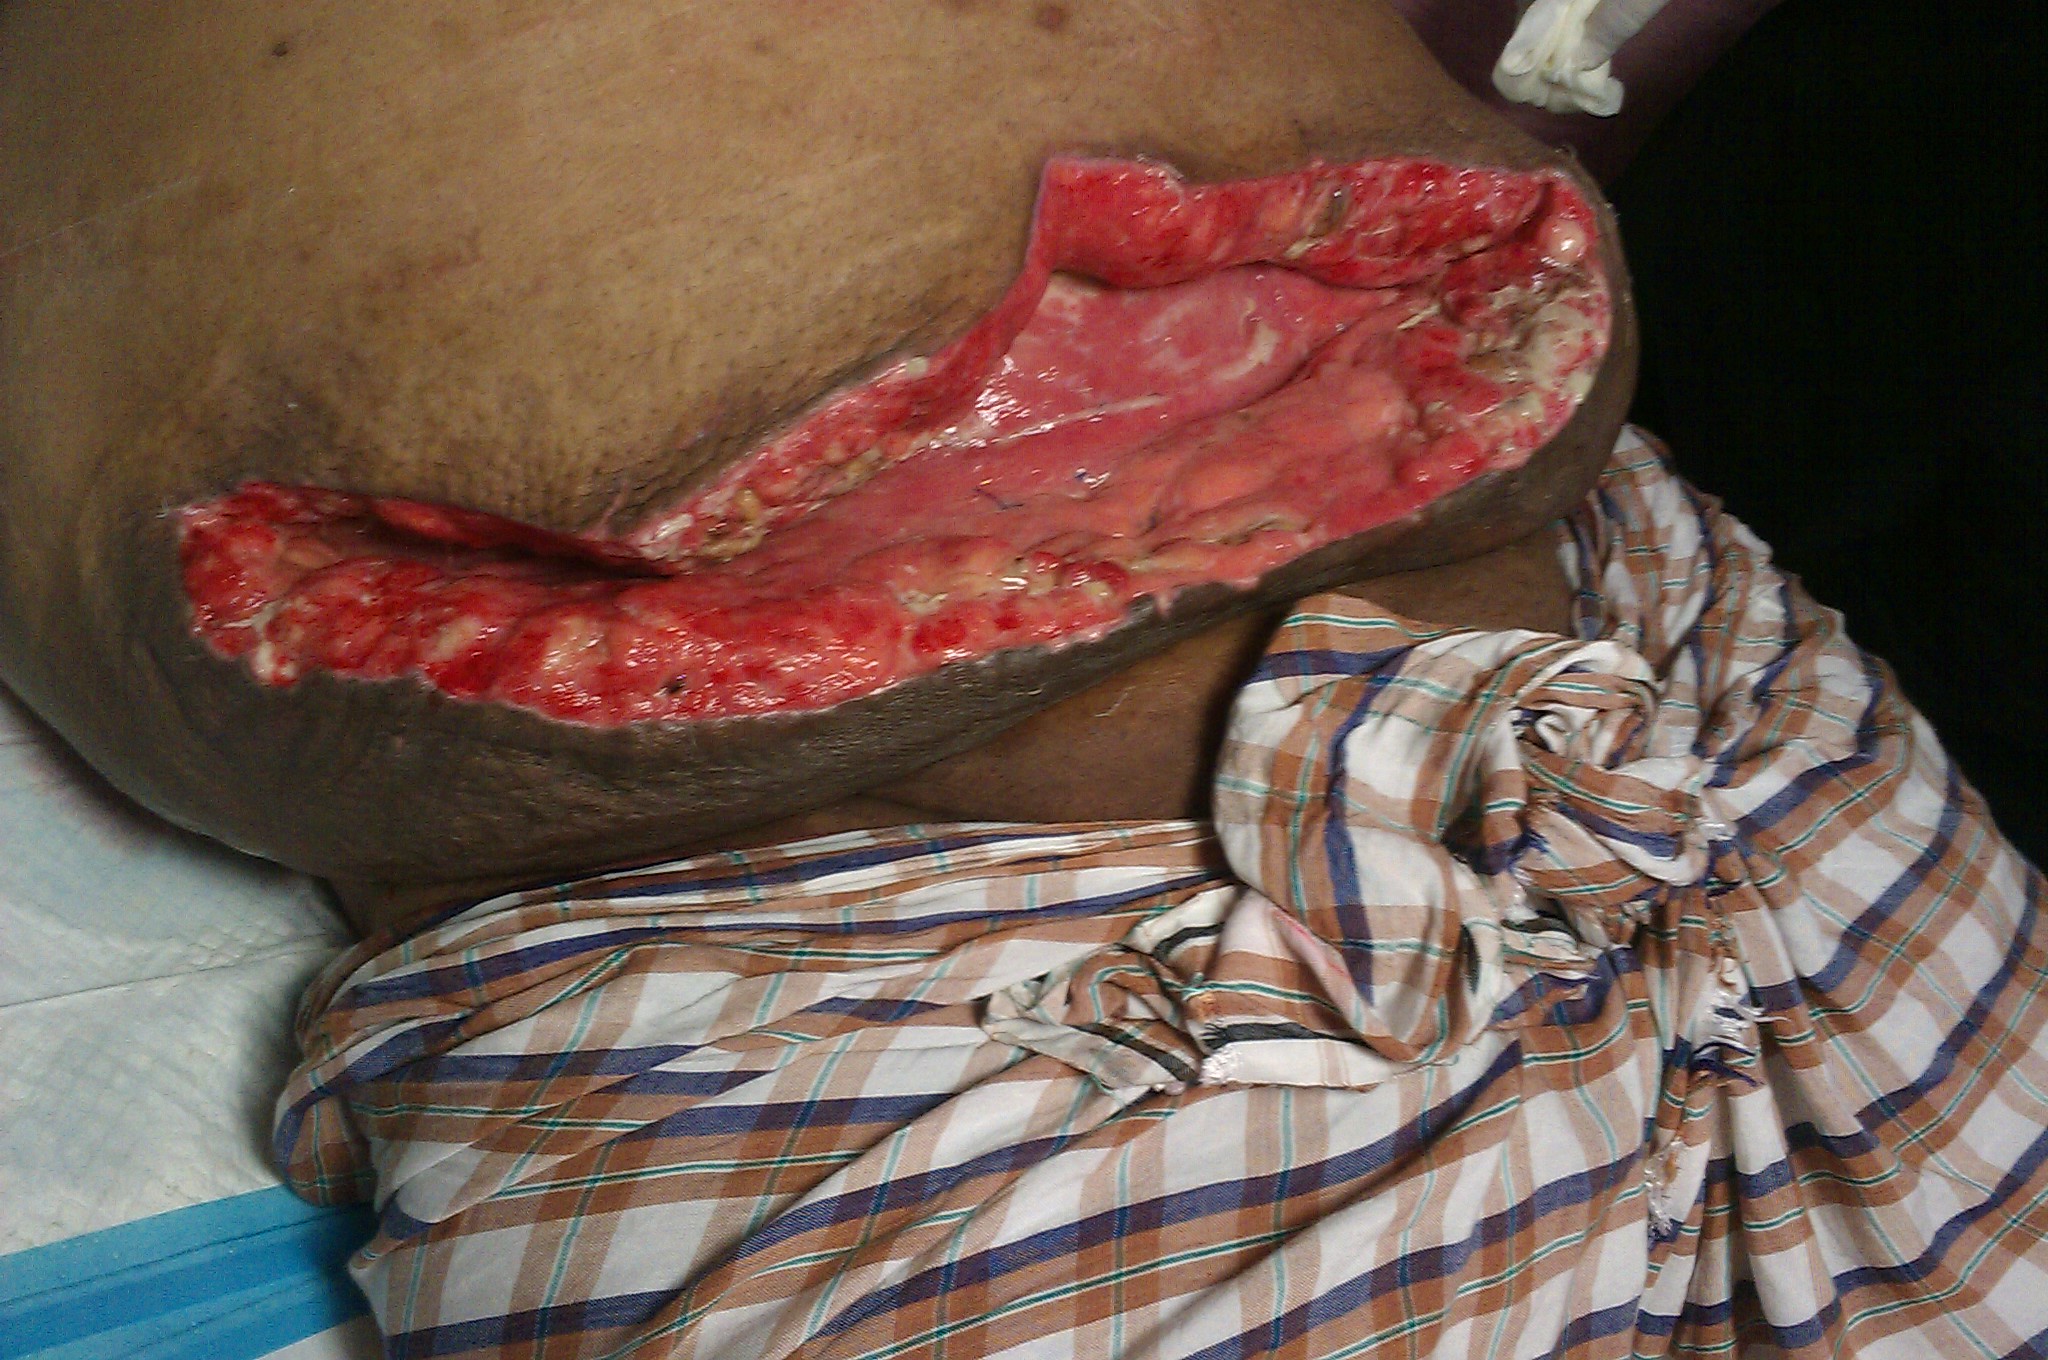
The Physics of Abdominal Tension
If a client eviscerates, your first thought must be about mechanical tension. If you stretch a rubber band, it pulls tight. If you bend the rubber band, it goes slack. The abdominal muscles work the same way.
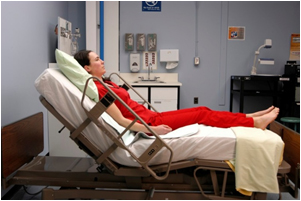
Placing a client in a low Fowler's position with flexed knees reduces mechanical tension on an abdominal incision. By elevating the head slightly and bending the knees, you create slack in the abdominal muscles, preventing the abdominal contents from being pushed further out of the opening.
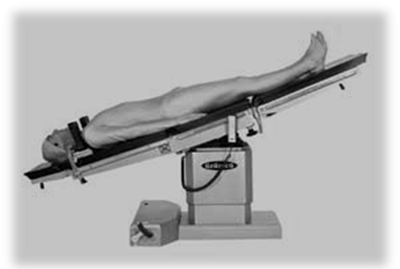
CRITICAL WARNING: Placing a client in the Trendelenburg position is contraindicated during an active abdominal wound evisceration. Trendelenburg (head down, feet up) uses gravity to shove all the heavy abdominal organs upward against the diaphragm and the abdominal wall, drastically increasing intra-abdominal pressure and worsening the evisceration!
The Evisceration Protocol: Protect and Preserve
When an organ is exposed to the outside air, it immediately begins to dry out, and its blood supply can easily become kinked or compromised.
- Call for Backup: You cannot leave this client. Wound evisceration requires an immediate call for a rapid response team or the primary healthcare provider.
- Cover the Organ: An eviscerated organ requires immediate covering with sterile medical dressings.
- Keep it Wet: Sterile dressings used to cover an eviscerated organ must be soaked in sterile normal saline. The tissues inside the body are bathed in a saline-like environment. Dry gauze would stick to the organ and tear the tissue; wet saline gauze keeps the tissue moist and viable.
- Hands Off: Healthcare personnel must never attempt to push an eviscerated organ back into the abdominal cavity. Pushing on the organ can kink the delicate blood vessels supplying it, causing immediate ischemia (tissue death), or introduce massive amounts of bacteria deep into the sterile peritoneal cavity.
- Monitor for Shock: Why do people die from evisceration? It's not just infection; it's fluid dynamics. Clients experiencing wound evisceration are at high risk for developing hypovolemic shock due to fluid loss. The exposed peritoneal membrane is incredibly vascular and porous. It will weep plasma rapidly into the outside air, dropping the client's blood pressure dramatically.
We use intravenous lines to bypass the digestive tract and deliver fluids and medications straight into the systemic circulation. But inserting a plastic catheter into a vein is an unnatural act, and things frequently go wrong. The key is knowing how the tissue reacts to different fluids.
The Leak: Infiltration
Imagine a garden hose with a hole in it, buried underground. The water doesn't reach the garden; it just makes a giant puddle in the dirt. That is infiltration.
Intravenous infiltration occurs when a non-vesicant intravenous fluid leaks into the surrounding subcutaneous tissue. A "non-vesicant" fluid is generally harmless to the tissue (like normal saline)—it just doesn't belong there. Because the fluid is accumulating in the tissue, you will observe very specific physical signs:
- Signs of intravenous infiltration include localized tissue swelling at the catheter insertion site (the puddle is expanding).
- Signs of intravenous infiltration include tissue pallor at the catheter insertion site (the fluid pushes the tiny superficial capillaries flat, squeezing the red blood out of the skin).
- Signs of intravenous infiltration include coolness to the touch at the catheter insertion site (the room-temperature IV fluid is chilling the warm body tissue).
The immediate action for a suspected intravenous infiltration is to stop the fluid infusion. Once you remove the catheter, you need to deal with the puddle. Elevating an extremity affected by intravenous infiltration promotes the reabsorption of leaked fluid via gravity. You are literally using physics to drain the swamp back into the central circulation.
The Acid Burn: Extravasation
Now, imagine that same buried garden hose, but instead of water, it's leaking concentrated acid.
Intravenous extravasation involves the leakage of a vesicant medication into the surrounding tissue. What is a vesicant? It is a highly irritating chemical (like certain chemotherapy drugs or potassium chloride). Vesicant medications cause tissue necrosis upon leaking into subcutaneous tissues. They will literally melt and kill the fat and muscle around the IV site.
The initial action for intravenous extravasation is to stop the infusion immediately. However—and this is a crucial distinction from infiltration—do not rip the IV out yet! A nurse must leave the intravenous catheter in place initially during extravasation to administer a specific chemical antidote. The catheter is your only direct tunnel right into the heart of the chemical spill. You use it to push the antidote directly into the burning tissue, and then you remove it.
The Angry Vein: Phlebitis
Sometimes the fluid stays in the vein perfectly, but the vein itself is furious about the plastic catheter or the irritating medication flowing through it. It triggers a localized inflammatory response.
Intravenous phlebitis is characterized by erythema (redness) along the course of the cannulated vein. If you look at the arm, you might see a distinct red streak following the path of the blood vessel. Because it is an inflammatory process, intravenous phlebitis presents with localized warmth and pain at the intravenous insertion site.
The treatment? A nurse must remove the intravenous catheter immediately upon identifying intravenous phlebitis. The source of the irritation must be eliminated before it turns into a blood clot (thrombophlebitis).
| Complication | Pathophysiology | Key Symptoms | Initial Action |
|---|---|---|---|
| Infiltration | Non-vesicant fluid leaking into tissue. | Swelling, pallor, coolness. | Stop infusion. Elevate. |
| Extravasation | Vesicant (tissue-killing) drug leaking. | Pain, swelling, blistering, tissue necrosis. | Stop infusion. Keep catheter in for antidote. |
| Phlebitis | Inflammation of the vein itself. | Red streak along vein, warmth, pain. | Stop infusion. Remove catheter. |
Sometimes the therapy we give does exactly what it is supposed to do, but the client's immune system mistakenly identifies the therapy as a mortal enemy. This is an unexpected negative response.
The General Rule for Systemic Reactions
Whether it is an antibiotic, a pain medication, or a biological agent, an unexpected systemic allergic reaction to a medication infusion requires stopping the infusion immediately. Cut off the enemy supply lines. That is always step one.
The Nuclear Option: Anaphylaxis
Anaphylaxis is the immune system overreacting so violently that it accidentally kills the host. Massive amounts of histamine are dumped into the blood. Histamine causes two catastrophic things: it dilates the blood vessels (tanking blood pressure) and it causes severe swelling (edema) in the respiratory tract.
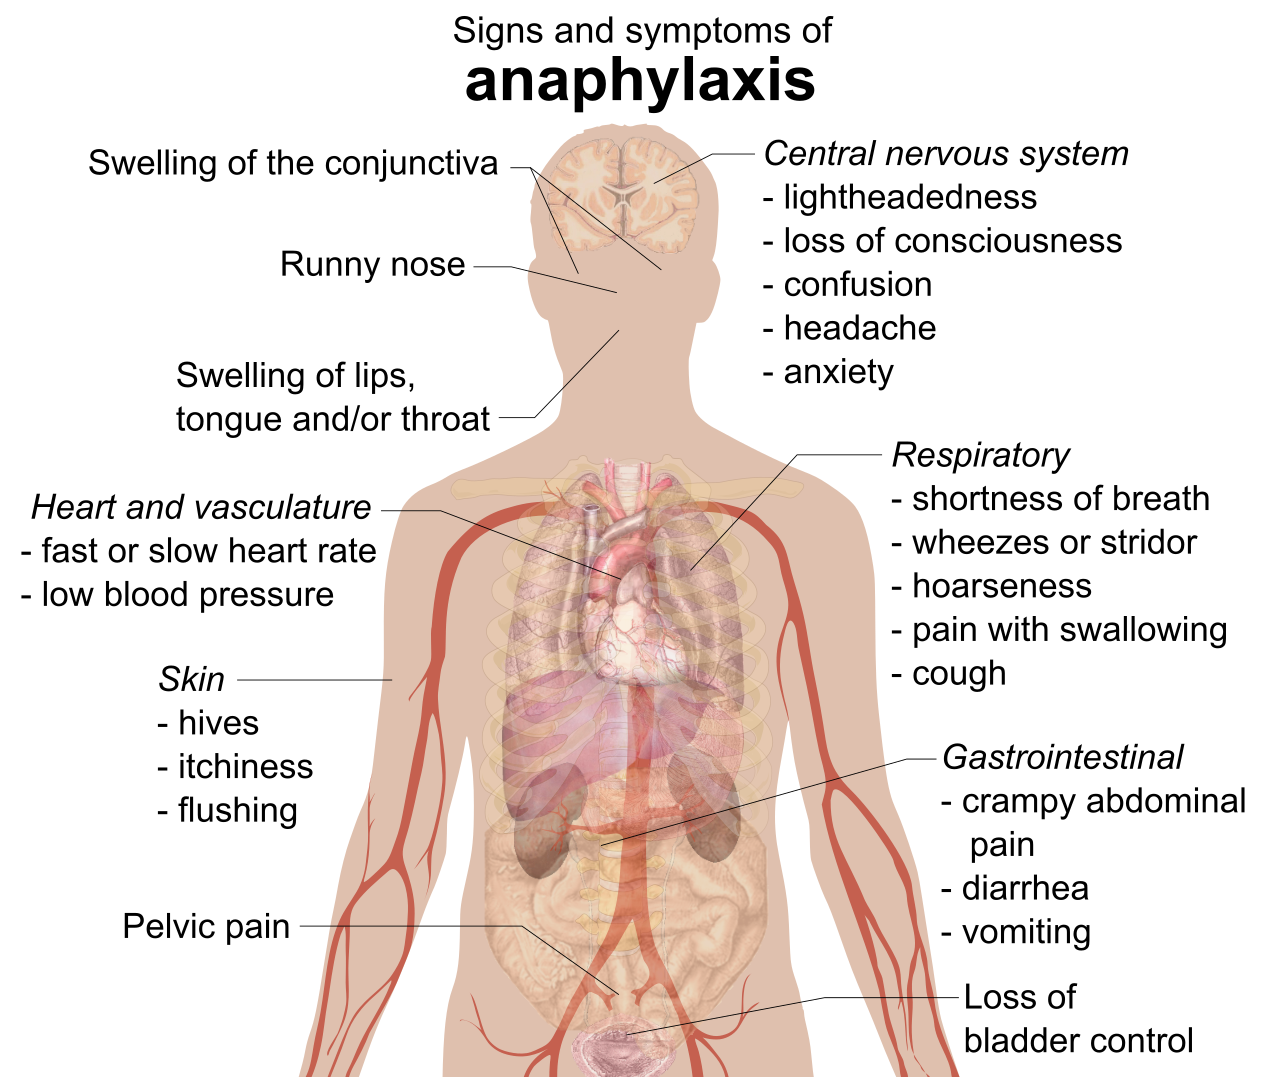
Anaphylaxis requires the immediate administration of intramuscular epinephrine. Why is epinephrine the magical cure? It is the ultimate physiological override switch. Epinephrine acts as a bronchodilator to treat life-threatening airway edema during an anaphylactic reaction. It aggressively forces the airways back open while simultaneously constricting the blood vessels to drive the blood pressure back up. It reverses the histamine crash on all fronts.
The Friendly Fire: Blood Transfusion Reactions
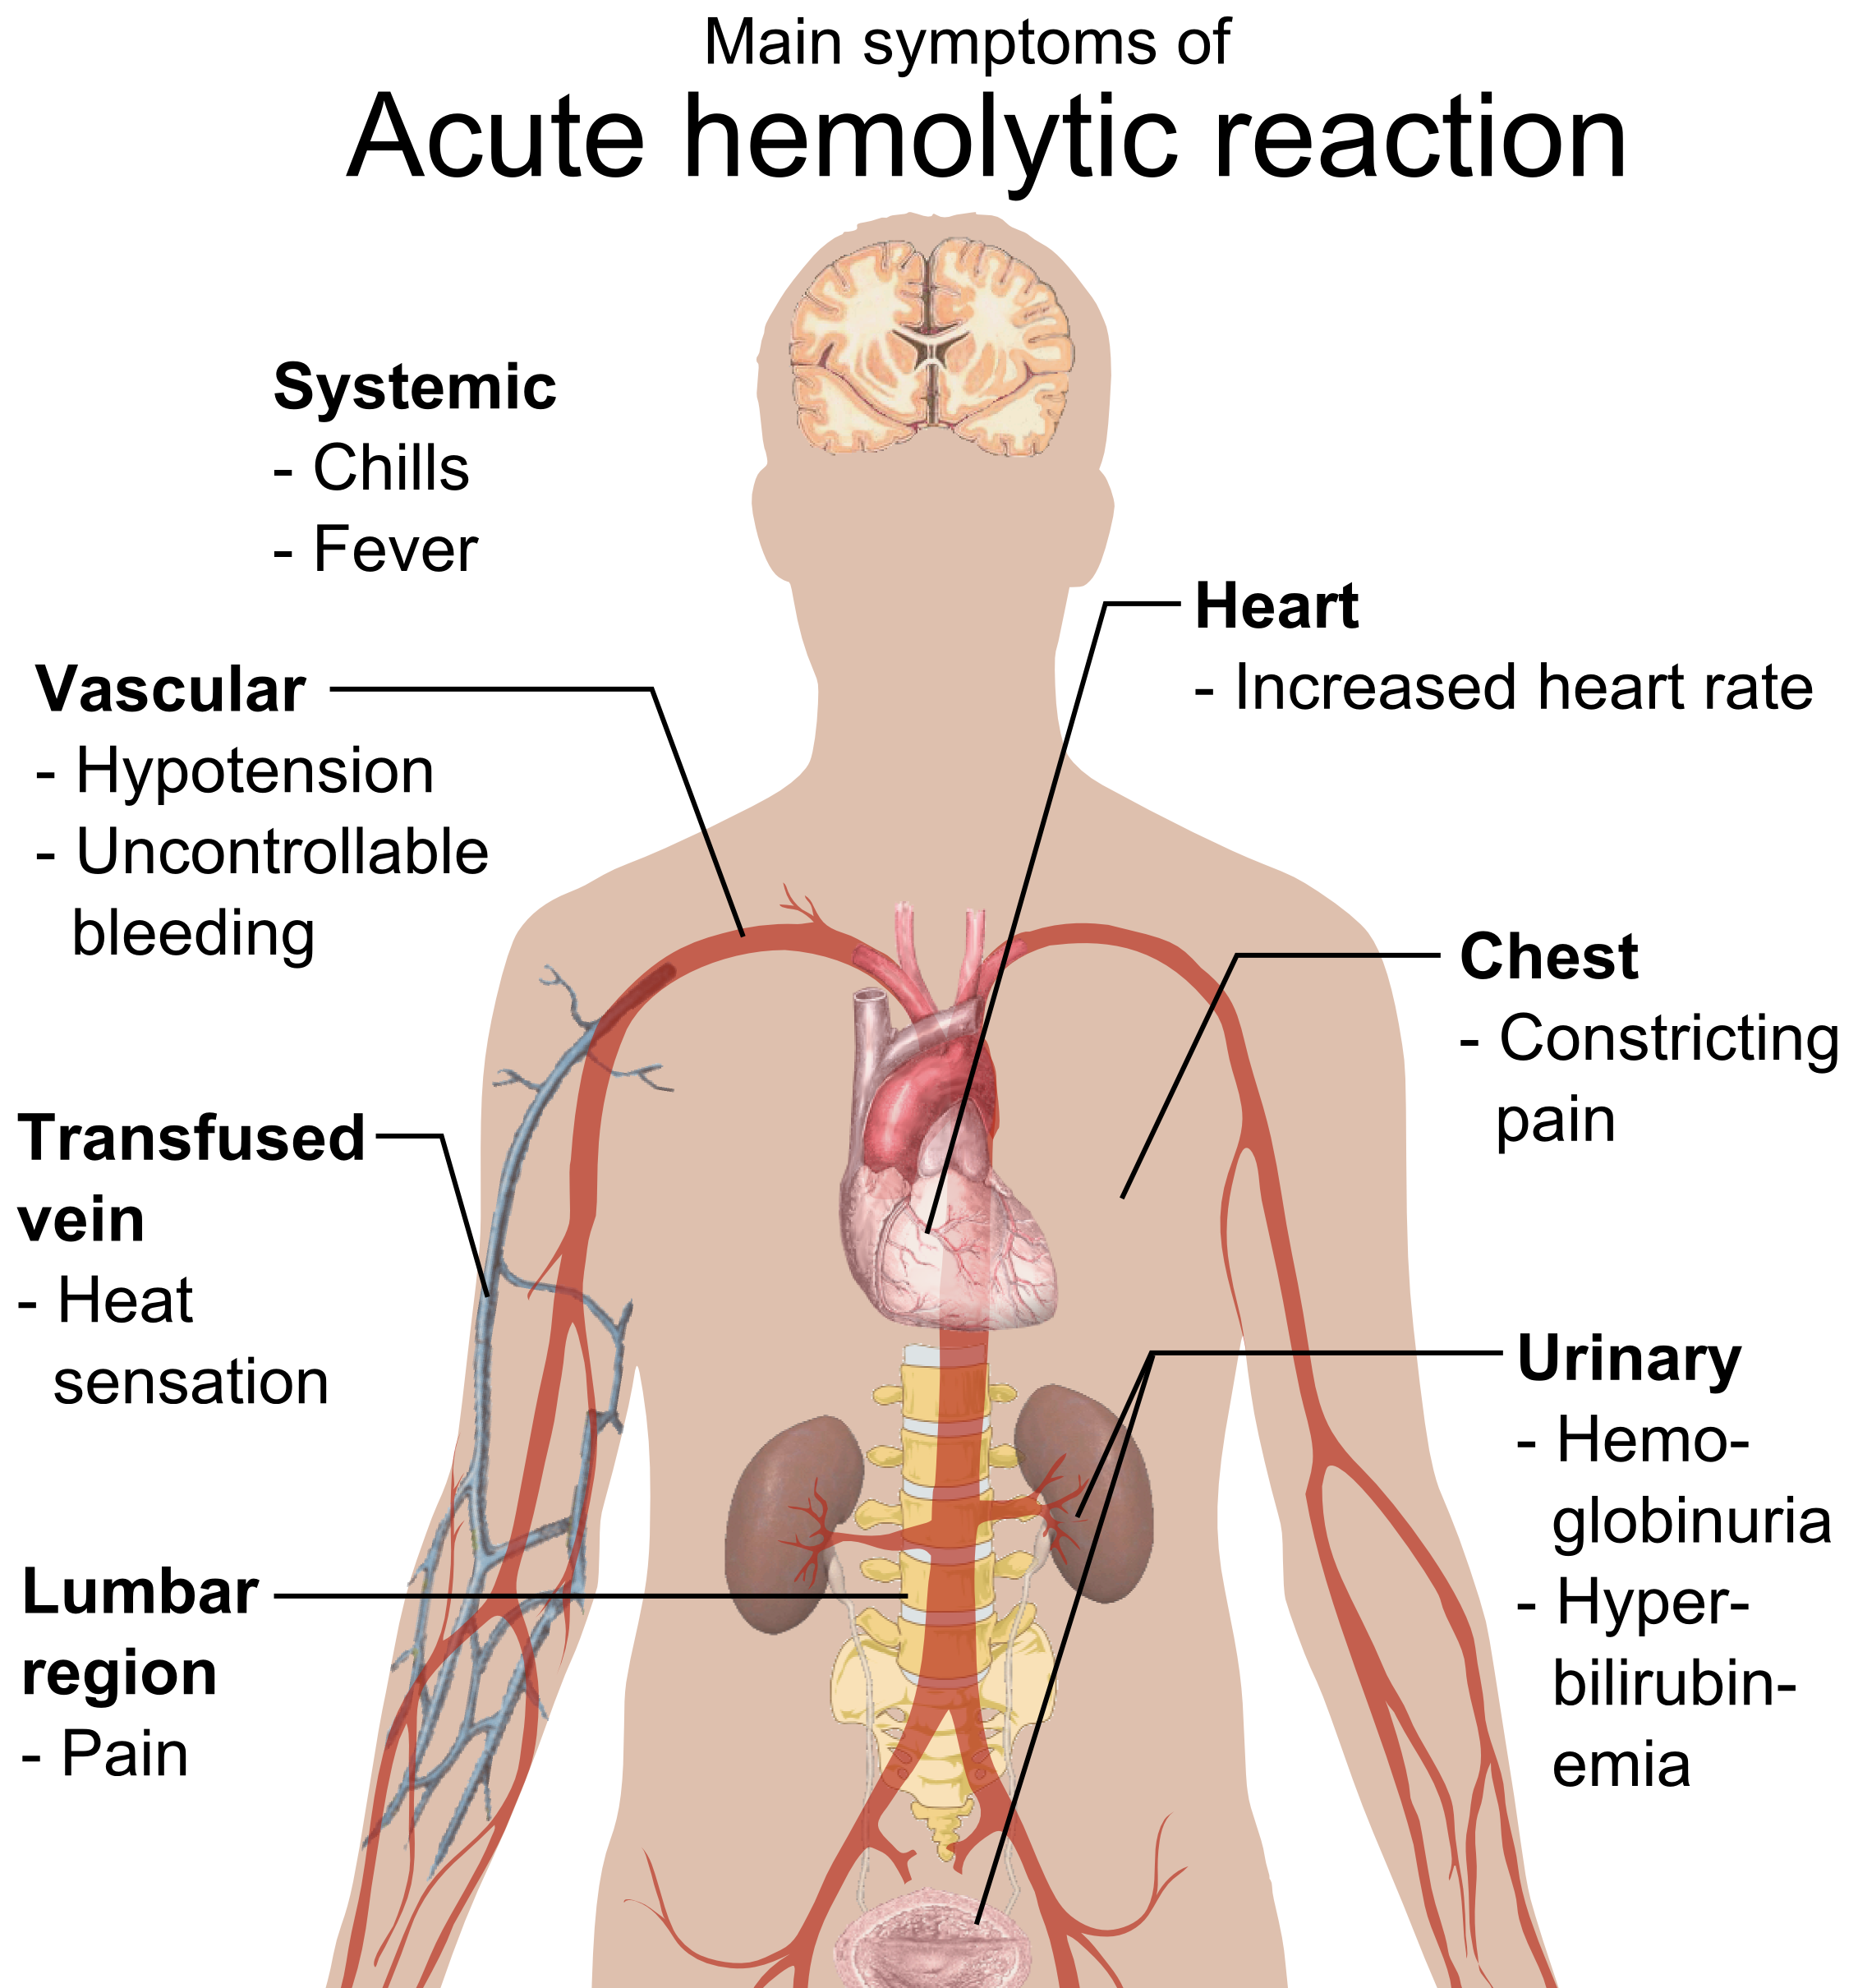
Giving a client blood is technically an organ transplant. You are putting billions of foreign, living cells into their circulation. If the donor blood type and the client's antibodies don't perfectly align, the client's immune system will attack and destroy the new red blood cells right inside the veins. We call this an acute hemolytic reaction.
When those red blood cells are destroyed (lysed), they dump their cellular debris directly into the bloodstream.
- Symptoms of an acute hemolytic blood transfusion reaction include an unexplained fever and chills. (The inflammatory response to the "invasion").
- Symptoms of an acute hemolytic blood transfusion reaction include sudden lower back pain. Why the lower back? Because the kidneys sit right there (flank area). The kidneys are the body's filters, and suddenly they are completely clogged with the broken debris of millions of dead red blood cells. The sudden back pain is the physical sensation of the kidneys choking.
How do we intervene?
- Halt the Attack: The initial step in managing a suspected blood transfusion reaction is to halt the blood transfusion immediately.
- Flush the System: We need to keep the veins open and flush out the kidneys, but we absolutely cannot push the remaining bad blood from the IV tubing into the client. Normal saline must be infused through completely new intravenous tubing after stopping a blood transfusion reaction. If you use the existing tubing, you are just flushing a massive bolus of the deadly mismatched blood right into the client's heart! Disconnect at the hub, attach brand new primed saline tubing, and open the fluids.
Science is about observation, and nursing is an applied science. If you perform a brilliant save during an emergency but fail to document it accurately, legally and clinically, it is a mess.
When a client experiences an emergency or a negative response to therapy, vague notes like "client had a bad reaction, doctor notified" are completely unacceptable.
- Paint the Clinical Picture: Documenting an unexpected negative response to therapy requires detailing the exact client symptoms observed. Did the client have a rash? Where was it? Was it raised or flat? Did they wheeze? What were their vital signs? Future healthcare providers need to read your note and feel as though they are standing right next to the bed looking at the client.
- Map the Rescue: Documenting an unexpected negative response to therapy requires recording the precise sequence of all nursing interventions performed. Time matters in a crisis. Note the exact minute the infusion was stopped. Note the time the new tubing and normal saline were initiated. Note the time the primary healthcare provider was called, what orders were given, and when the epinephrine was administered.
The Feynman Takeaway: When things go wrong, remember that the human body is just following the rules of physiology and physics. If you understand those rules—how pressure moves, how fluids shift, how the electrical systems wire together—you will never have to rely on blind memorization. You will know what to do because it makes perfect sense. Keep calm, assess the mechanics of the emergency, and take action. You've got this!