Potential for Complications of Diagnostic Tests, Treatments, and Procedures
Not sure you’re ready?
Take the ~3-minute readiness diagnostic and see where you stand.
The Physics of Patient Care: Understanding Diagnostic and Procedural Complications
Hello, everybody! Let's talk about what happens after the procedure is over.
When you really think about it, modern medicine is astonishing. We poke holes into highly pressurized blood vessels, we slide tubes into sterile organs, and we thread cameras down into the delicate depths of the digestive tract. But every time we do this, we are fundamentally altering the physics and the physiological equilibrium of the human body.
You see, the body has a wonderful set of rules it likes to follow. It likes its pressures balanced, its sterile areas closed off, and its fluids safely locked inside their compartments. When we perform diagnostic tests, treatments, and procedures, we temporarily break those rules. As nurses, your job isn't just to watch the patient; your job is to understand the physics of why complications happen so you can stop them before they start.
Let's break this down into four simple concepts: Plumbing and Gravity, Punctures and Pressures, The Vascular Highway, and The GI Obstacle Course.
When we insert a tube into a patient, we are building a plumbing system. And what governs plumbing? Gravity and pressure!
The Urinary Tract: A Sterile Vault
Think of the bladder as a pristine, sterile vault. Inserting an indwelling urinary catheter requires strict sterile technique because the moment you cross that barrier, you risk letting invaders in. Once the tube is in, maintaining a closed urinary drainage system prevents the introduction of external pathogens into the urinary tract. Do not open that system unless you absolutely have to!

Now, let's talk about gravity. Fluids flow downhill. Therefore, the urinary drainage bag must remain below the level of the client's bladder at all times. If you lift that bag up to the bed rail to move the patient, you have just created a slide for bacteria-laden urine to flow right back into that sterile vault.
Finally, think about mechanics. A tube hanging loose is a lever just waiting to be pulled. Securing an indwelling catheter to the client's leg prevents urethral traction and associated tissue trauma.
Gastric Tubes: Location, Location, Location
When you drop a nasogastric (NG) tube blindly down a patient's throat, how do you really know where it went? Did it go into the stomach, or did it take a wrong turn into the lungs?
Feynman's Golden Rule of Tubes: Never put anything into a tube until you know exactly where the other end is.
Because of this, an abdominal X-ray is the most reliable method to verify the initial anatomical placement of a nasogastric tube. Once that initial X-ray confirms it, you can use chemical verification for ongoing checks: the pH of aspirated gastric contents should be less than 5.0 to confirm appropriate placement in the stomach. (Stomach acid is highly acidic—if you pull back fluid with a pH of 7.5, you might be in the lungs!)
When it comes time to feed the patient, gravity is our safety net once again. Elevating the head of the bed to at least 30 degrees during continuous enteral feedings prevents gastric reflux and pulmonary aspiration.
Chest Tubes: Managing the Vacuum
The pleural space surrounding the lungs isn't an empty room; it's a carefully maintained vacuum. If we put a chest tube in, we have to protect that vacuum.
Just like the urinary bag, a chest tube drainage system must remain below the level of the client's chest to prevent fluid backflow into the pleural space.
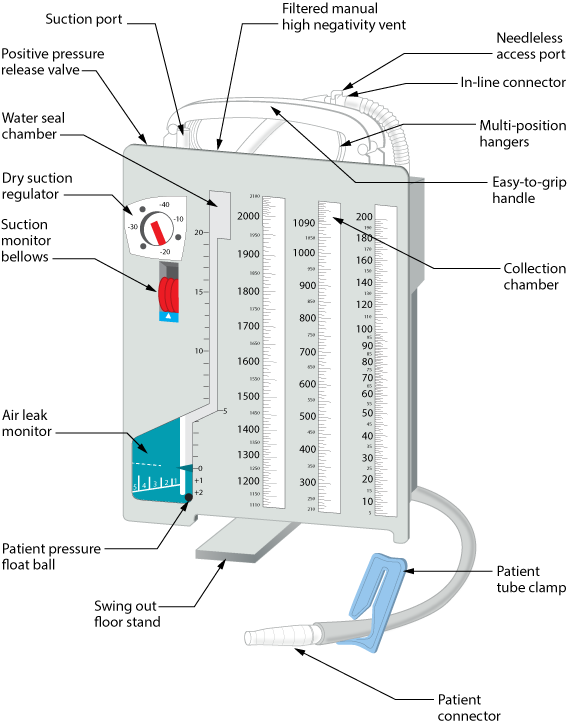
Now, look at the water-seal chamber on that drainage system. A little tidaling (movement with breathing) is normal. But if you see it bubbling like a hot tub? Stop and investigate. Continuous bubbling in the water-seal chamber of a chest tube drainage system indicates a pathological air leak. Air is escaping from the lung and pouring out through the system.
What if you need to change the system? Should you clamp the tube? Almost never. Clamping a chest tube without a specific medical order prevents air escape and increases the risk of a tension pneumothorax. If air is leaking out of the lung into the pleural space and you clamp the exit route, the pressure builds up, crushes the heart, and you have a life-threatening emergency on your hands.
Whenever we stick a needle into a closed compartment, we run three major risks: letting air in, letting fluid out, or causing a bleed. Let's look at four classic puncture procedures.
The Liver Biopsy: A Bleeding Risk
The liver is a highly vascular organ that is extremely prone to bleeding after invasive puncture procedures. It's essentially a giant, blood-filled sponge. When you pull a biopsy needle out of it, it wants to bleed.
How do we apply a bandage to an internal organ? We use the patient's own anatomy! Positioning a client on the right side after a liver biopsy applies physical pressure to the puncture site to reduce the risk of hemorrhage. Because the liver is on the right, gravity pushes the heavy organ against the abdominal wall, tamponading the puncture. To make sure the clot is fully formed, a client must lie on their right side for at least two hours immediately following a percutaneous liver biopsy.
The Lumbar Puncture (LP): The Fluid Leak
A lumbar puncture involves inserting a needle into the subarachnoid space to withdraw cerebrospinal fluid (CSF). You've just created a tiny hole in the pressurized sac holding the brain and spinal cord fluid.
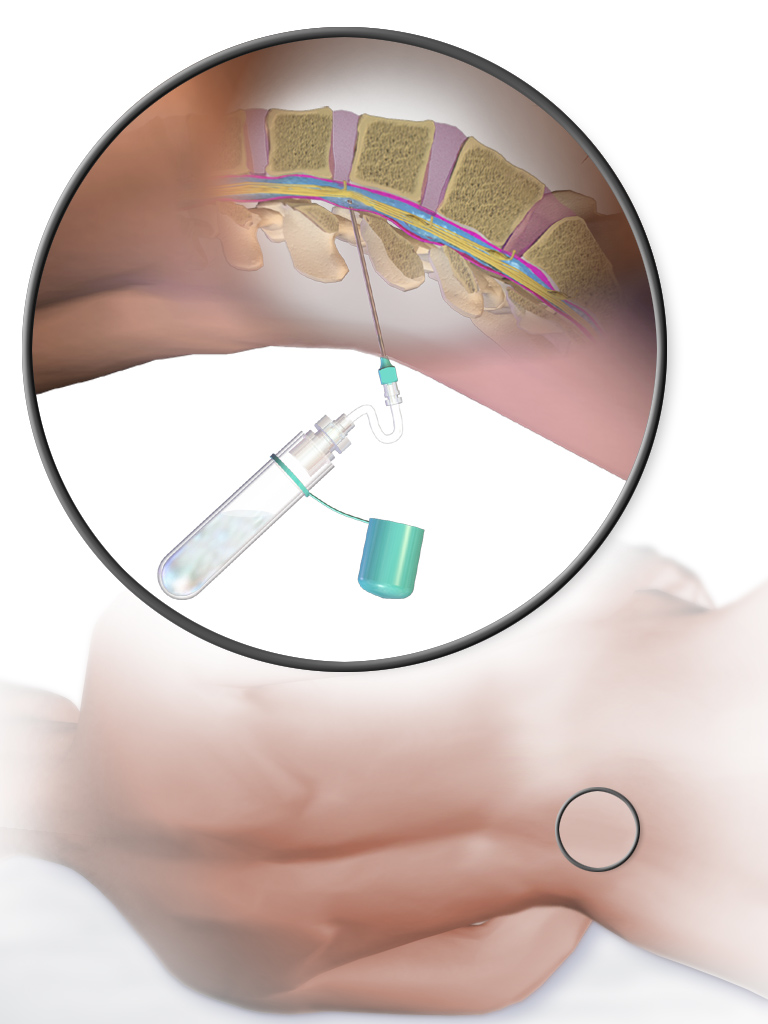
If that hole doesn't seal perfectly, fluid leaks out. When fluid leaks out, pressure drops. Cerebrospinal fluid leakage from a lumbar puncture site reduces intracranial pressure and causes a severe spinal headache. How do we prevent this? Take gravity out of the equation! A client must remain flat in a supine position for four to eight hours after a lumbar puncture so the fluid doesn't pool downward and leak out of the puncture site.
Thoracentesis: The Lung Vacuum
Thoracentesis is the needle aspiration of fluid or air from the pleural space. We are sticking a sharp needle incredibly close to the delicate, balloon-like tissue of the lung.
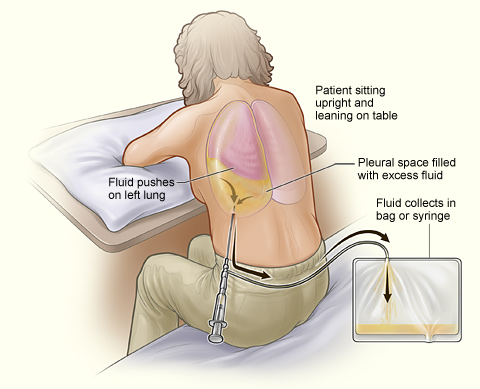
If that needle accidentally nicks the lung tissue, air escapes into the pleural space. This means a pneumothorax is a life-threatening potential complication of a thoracentesis. You must watch the mechanics of how the patient breathes afterward. If the left chest rises beautifully but the right side barely moves, pay attention! Asymmetrical chest expansion observed after a thoracentesis strongly indicates a possible pneumothorax.
Paracentesis: The Great Fluid Shift
Paracentesis involves the needle aspiration of ascitic fluid directly from the peritoneal cavity. Sometimes we pull off 3, 4, or even 5 liters of fluid.
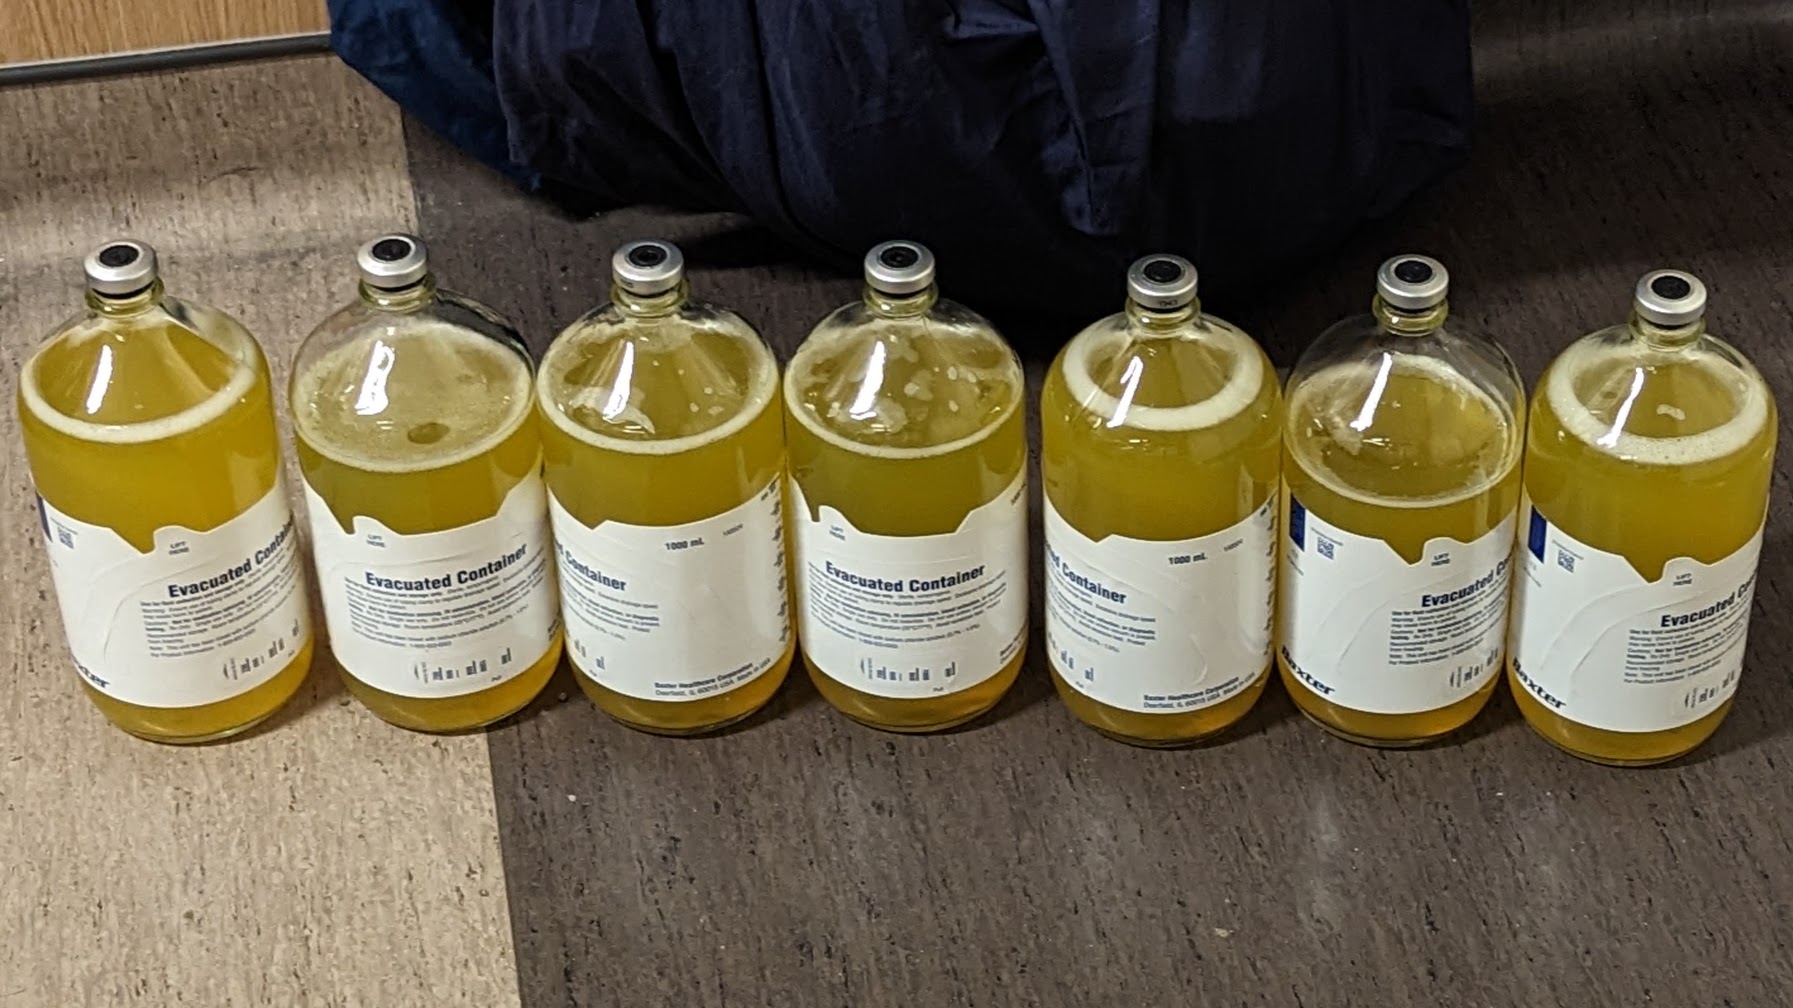
But wait! Nature hates a vacuum. If you suddenly remove a massive amount of pressure from the abdomen, the blood vessels dilate, and water from the bloodstream rushes out into the tissues to replace what you took. Rapid removal of a large volume of ascitic fluid causes an abrupt decrease in intravascular fluid volume.
Because the fluid leaves the bloodstream, the blood pressure plummets. Hypovolemic shock is a primary complication resulting from fluid shifts after removing large volumes of ascitic fluid during a paracentesis. Your nursing priority is crystal clear: A nurse must monitor the client's blood pressure frequently for signs of hypotension following a paracentesis.
Summary Table: Puncture Positioning & Risks
| Procedure | Action/Positioning Post-Procedure | Primary Reason / Complication Prevented |
|---|---|---|
| Liver Biopsy | Right side-lying for 2+ hours | Compresses highly vascular tissue to stop hemorrhage |
| Lumbar Puncture | Flat supine for 4-8 hours | Prevents CSF leak, reducing risk of spinal headache |
| Thoracentesis | Monitor chest expansion/symmetry | Detects accidental lung puncture (pneumothorax) |
| Paracentesis | Monitor BP frequently | Detects abrupt fluid shifts leading to hypovolemic shock |
Blood vessels operate on a pressure gradient. Arteries are high-pressure hoses pumping blood away from the heart. Veins are low-pressure (sometimes negative-pressure) return pipes. You must treat them differently!
Cardiac Catheterization (Arterial Access)
To look at the coronary arteries, we have to go against the flow of traffic. Cardiac catheterization requires direct arterial access through the femoral or radial artery.
Because you've punched a hole in a high-pressure pipe, bleeding and hematoma formation are the primary risks at the arterial insertion site following a cardiac catheterization. If you accessed the femoral artery (in the groin), bending the leg will pop that clot right open. Therefore, a client must keep the affected extremity completely straight for several hours after a femoral cardiac catheterization.
But you also have to make sure you didn't accidentally block the pipe with a clot when you left. Check the pulses downstream! Absent or diminished distal pulses after an arterial procedure indicate impaired limb perfusion, which is an absolute emergency.
Central Venous Catheters (Venous Access)
Central lines go straight into the large veins near the heart. When a patient inhales, the pressure inside the chest actually becomes negative.
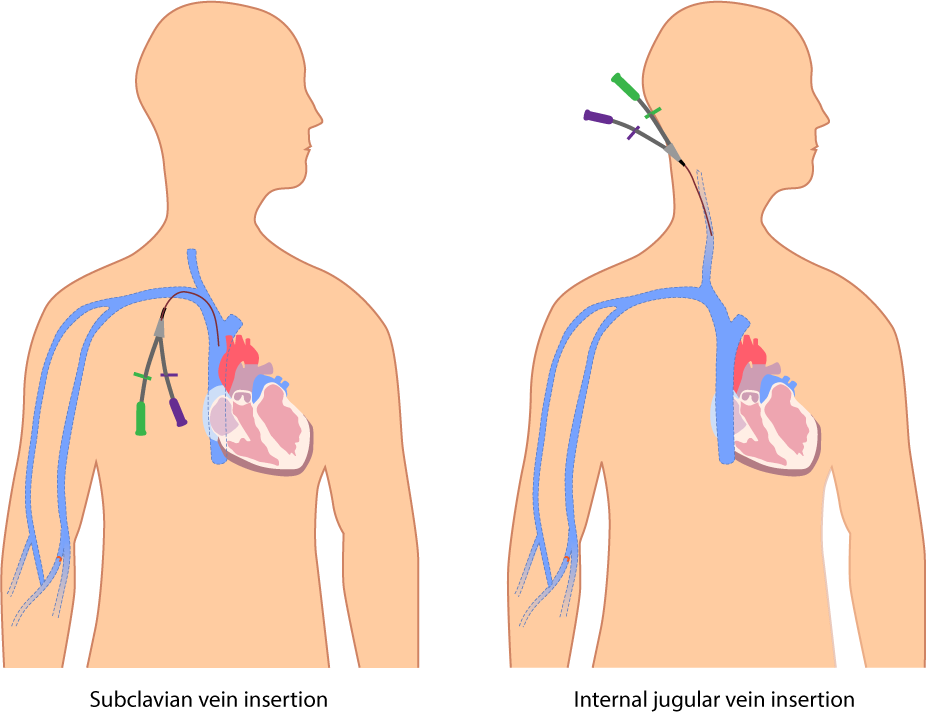
When you pull that central line out, you briefly leave an open tunnel straight to the heart. Because of the negative pressure, central venous catheter removal carries a significant risk of introducing air into the venous circulation.
How do we turn negative pressure into positive pressure? Have the patient bear down as if having a bowel movement! Performing the Valsalva maneuver during central venous catheter removal increases intrathoracic pressure to block air entry into the vein. The moment the catheter is out, you seal the tunnel: A nurse must apply a sterile occlusive dressing immediately after removing a central venous catheter.
Finally, let's talk about the GI tract. We scope it, we spray it, and we fill it with heavy metals to see it on X-rays.
Bronchoscopy: The Gag Reflex
Wait, a bronchoscopy is for the lungs! Yes, but to get a camera down into the lungs without the patient gagging and vomiting, we have to numb the throat. A bronchoscopy requires the application of a local anesthetic spray to the throat to suppress the gag reflex.
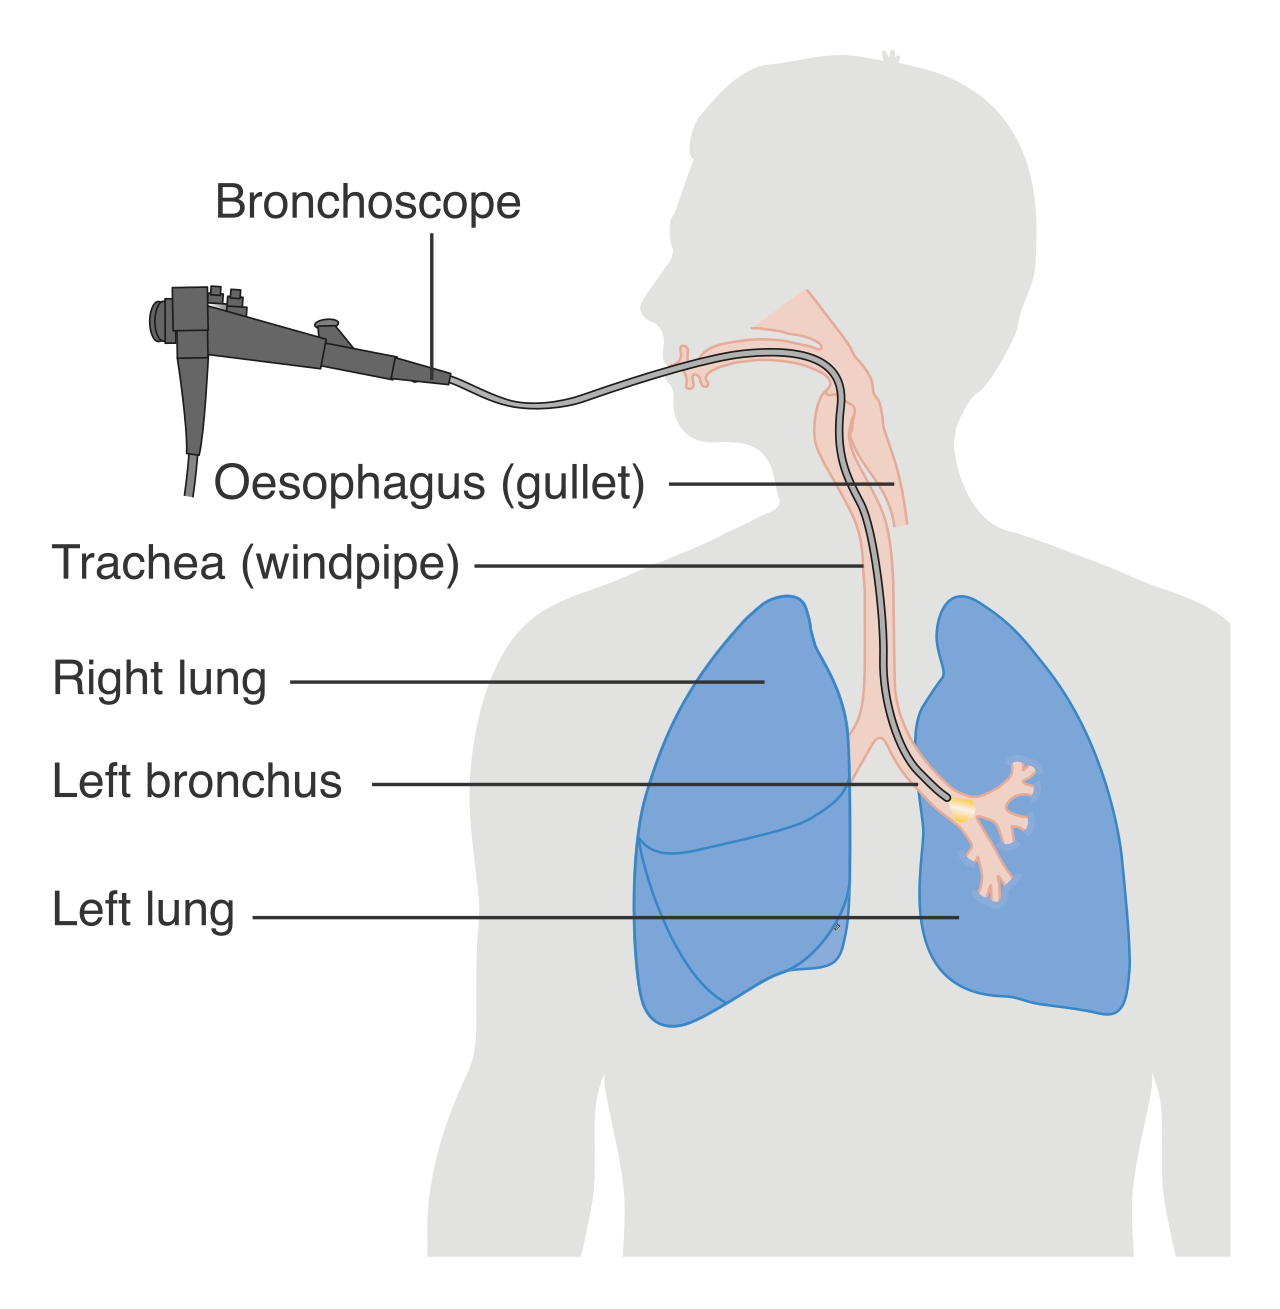
Here is the danger: The gag reflex is the trapdoor that protects the lungs from food and water. Until that reflex wakes up, the trapdoor is broken. Administering oral fluids before the complete return of the gag reflex increases the client's risk of pulmonary aspiration. You cannot just ask the patient, "Can you swallow?" You have to test the mechanics yourself. A nurse must verify the return of the gag reflex using a tongue depressor before offering any oral intake post-bronchoscopy.
Esophagogastroduodenoscopy (EGD): The Perforation Risk
During an EGD, we pass a flexible camera down the esophagus, into the stomach, and into the duodenum. It's safe, but the GI tract is thin tissue. What if the scope scrapes or pokes a hole through the wall?
Digestive enzymes and stomach acid will immediately leak into the sterile peritoneal cavity. The patient won't just say their tummy hurts; they will have a severe, acute reaction. Sudden and severe abdominal pain after an esophagogastroduodenoscopy indicates a possible esophageal or gastric perforation. This is a surgical emergency.
Barium Studies: The Concrete Contrast
Sometimes we use barium, a heavy, chalky contrast medium, to light up the GI tract on an X-ray (like a Barium Enema). It works beautifully, but there's a catch: Barium absorbs water.
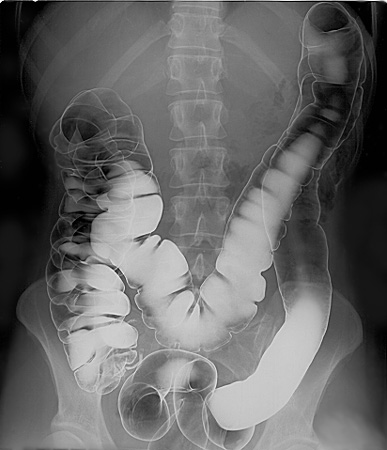
If barium sits in the intestines too long, it dries out into literal chalk. Barium contrast retained in the gastrointestinal tract can harden and cause a mechanical bowel obstruction.
We have to flush it out of the system fast. A client should increase oral fluid intake after a barium enema to facilitate the rapid excretion of the barium contrast. And be sure to warn your patient about the aftermath, or they will be terrified when they look in the toilet: A client's stool will appear chalky white for up to 72 hours after undergoing a diagnostic procedure involving barium contrast.
Final Thoughts
When you assess a patient after a procedure, don't just memorize a list of vitals to check. Picture the anatomy. Visualize the pressures. Remember where the fluid wants to go, where the air might escape, and how gravity is pulling on the system. If you understand the physics of the human body, you will instinctively know exactly what complication to look out for!