Welcome, future nurses! Think of the human body as an incredibly complex, brilliant piece of machinery. When it moves, the gears are turning, the fluids are pumping, and the electrical systems are firing beautifully. But what happens when you take this magnificent machine and leave it parked in bed for days on end?
Things start to break down. Gravity, which usually works with us, suddenly becomes our enemy. Fluids pool. Muscles shrink. Bones dissolve.
In this session, we are going to explore the profound mechanics of mobility. We’ll look at how we assess our patients' movement, how we protect them when they cannot move, and the precise physics of using assistive devices to get them back on their feet. Let’s dive right in!
Before you test-fly an airplane, what do you do? You check the instruments. As a nurse, you never blindly launch a patient into space—meaning, you never just pull someone out of bed.
First and foremost, nurses must assess a client's baseline mobility level before attempting to transfer the client. We need to know what they could do yesterday to know what is safe to do today. Similarly, nurses must assess a client's muscle strength before initiating ambulation. If the engine has no horsepower, that plane isn't flying.
To quantify this, we use a universal language: The muscle strength grading scale ranges from zero to five.
Grade
Clinical Presentation
What it Means
0
No contraction
The battery is dead. A muscle strength grade of zero indicates no visible muscle contraction and absolutely no palpable muscle contraction. You look, you feel, and there is nothing.
...
Varying degrees of weakness
The muscle can move slightly, perhaps with gravity eliminated or with partial resistance.
5
Normal
The engine is fully charged! A muscle strength grade of five indicates normal muscle strength against full resistance.
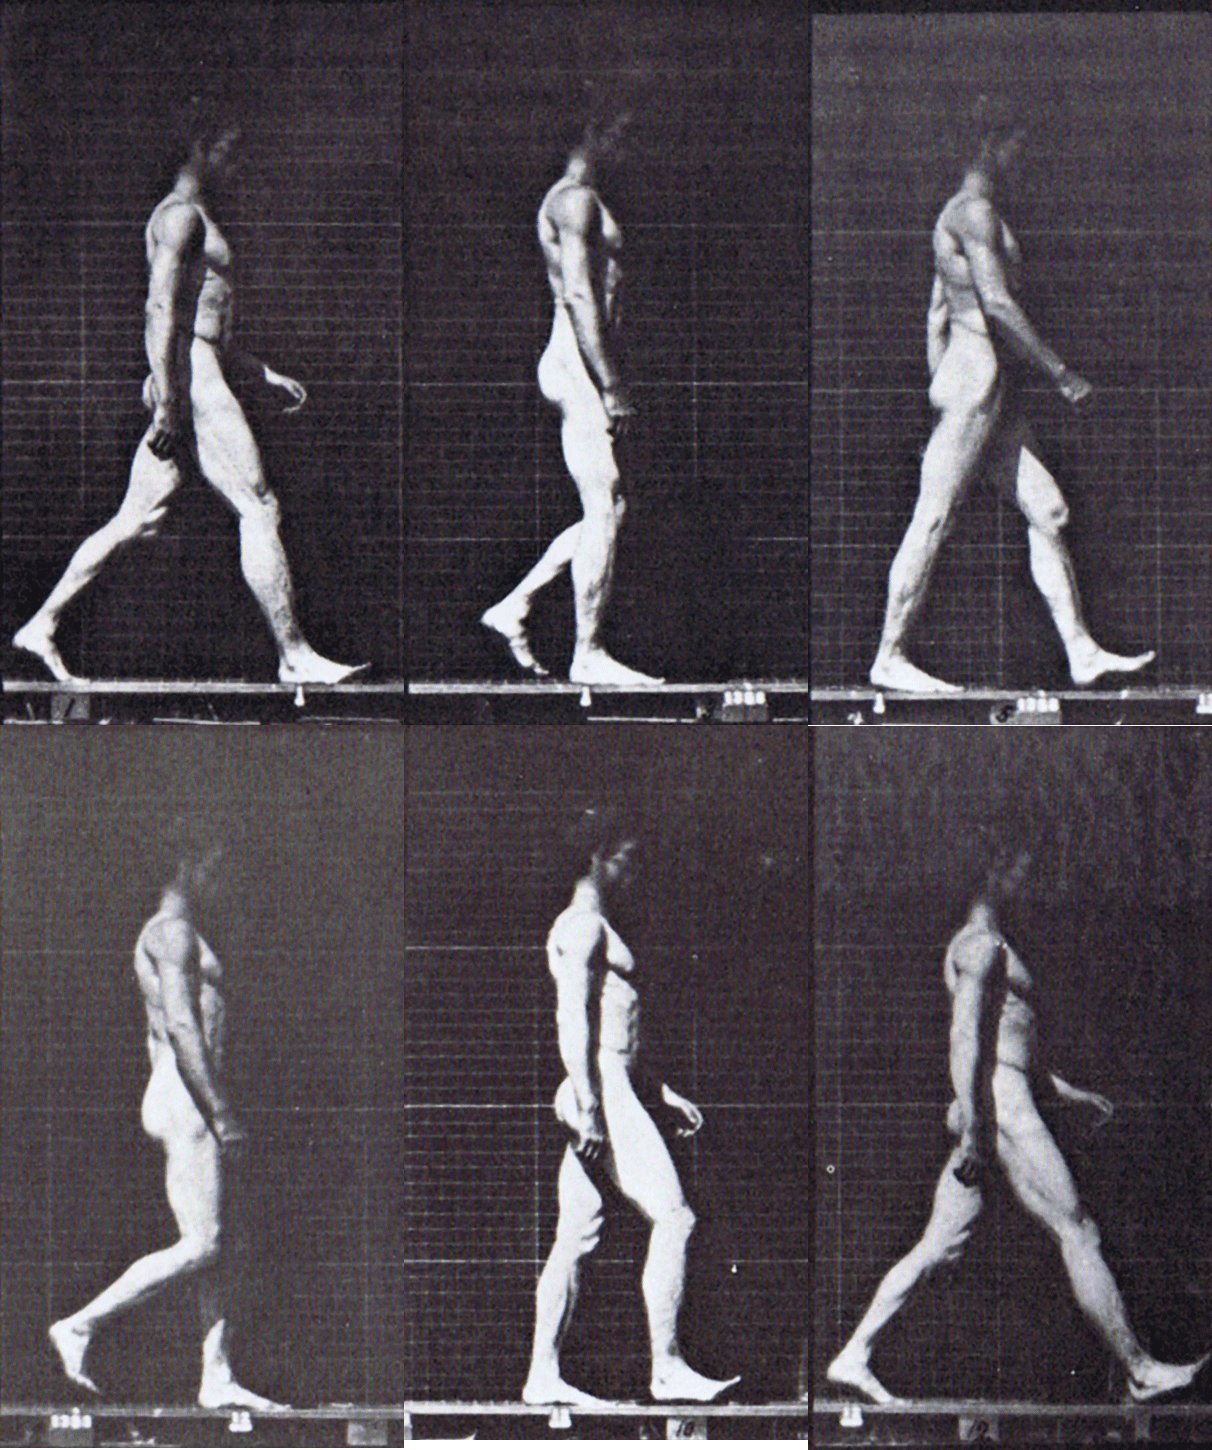
Finally, once the patient is up, we watch them walk. The nurse evaluates a client's gait to determine the risk for falls. How is their balance? Are they shuffling? By simply observing the mechanics of their stride, we predict and prevent disasters.
Observing the mechanics of a client's normal walking gait helps nurses identify abnormalities and assess fall risks.
If you leave a machine sitting idle, the oil thickens, the joints rust, and the battery drains. The human body is remarkably similar. Let's look at what happens system by system when a patient is immobilized.
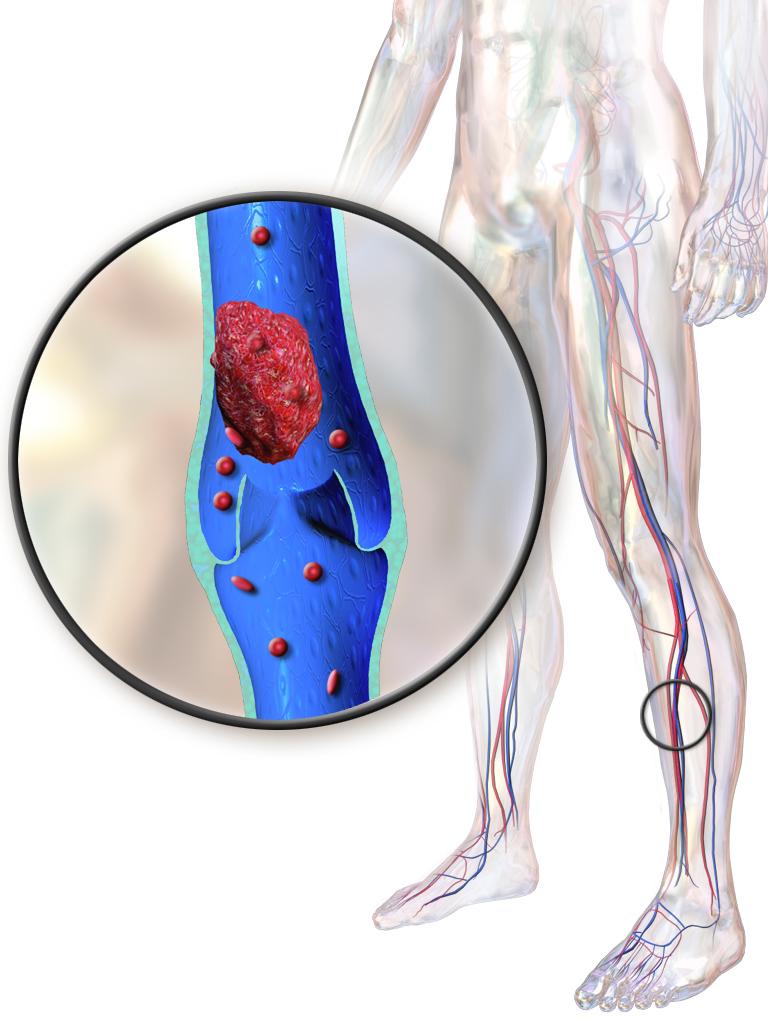
Blood is supposed to flow. When a patient lies still, immobility increases the risk of deep vein thrombosis (DVT) due to venous stasis. The blood just sits there in the legs like water in a stagnant pond, and stagnant water clots.
When blood pools in the lower extremities due to immobility, stagnant venous blood can coagulate into a deep vein thrombosis (DVT).
Source: Blausen 0290 DeepVeinThrombosis by BruceBlaus . When using this image in external sources it can be cited as: Blausen.com staff (2014). " Medical gallery of Blausen Medical 2014 ". WikiJournal of Medicine 1 (2). DOI : 10.15347/wjm/2014.010 . ISSN 2002-4436 ., CC BY 3.0.
Furthermore, the cardiovascular system forgets how to fight gravity. When the patient finally tries to sit up, gravity pulls the blood down, and because the vascular system is "asleep," immobility increases the risk of orthostatic hypotension during position changes.
In the lungs, gravity is equally relentless. Immobility causes pooling of respiratory secretions in the lower lung fields. When mucus sits in the lungs, two things happen:
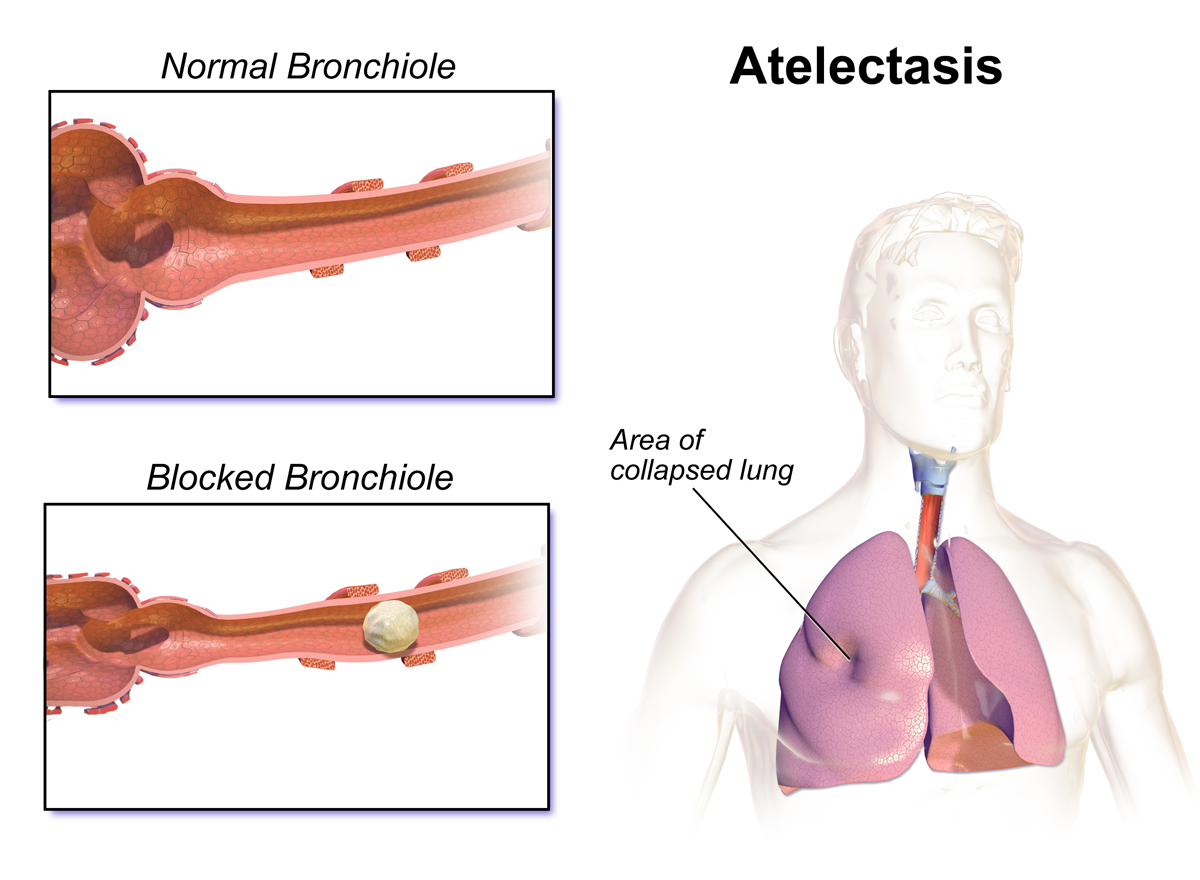
The tiny air sacs collapse, meaning pooling of respiratory secretions from immobility increases the risk of atelectasis.
Bacteria throw a party in that warm, dark fluid, meaning pooling of respiratory secretions from immobility increases the risk of pneumonia.
Pooling of respiratory secretions blocks tiny airways, causing the alveoli to collapse in a condition known as atelectasis.
Because there is no mechanical weight-bearing stress on the skeleton, the body thinks it doesn't need a strong frame. Immobility causes increased calcium excretion from bones. This excess calcium floods the bloodstream and filters through the kidneys, which increases the risk of renal calculi (kidney stones).
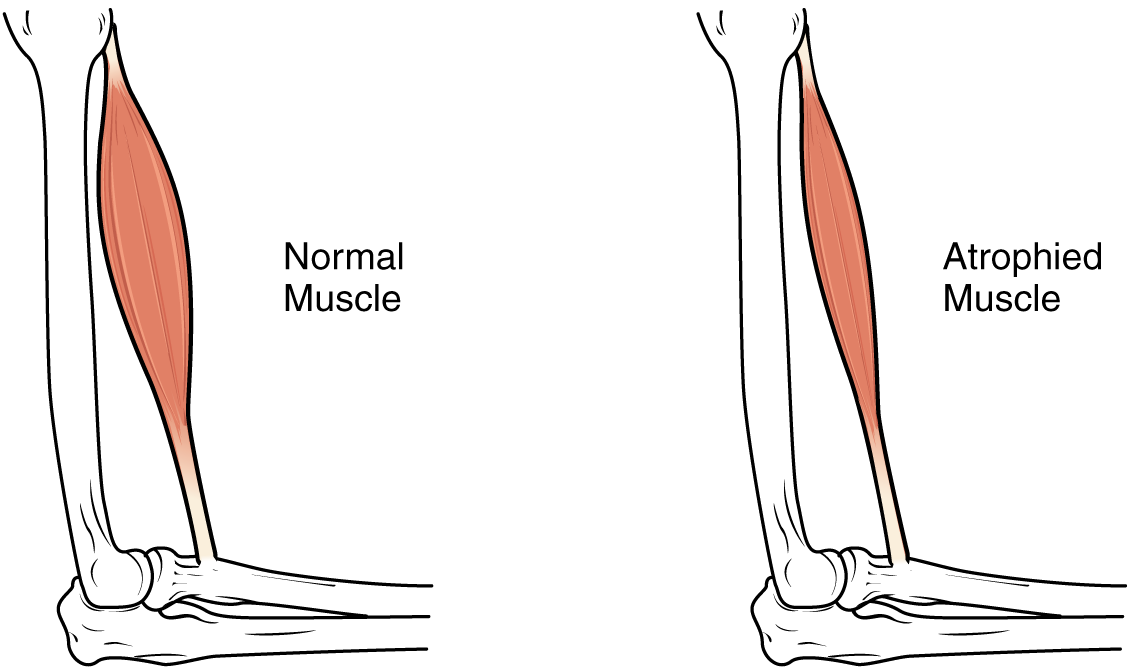
Prolonged immobility leads directly to muscle atrophy, as unused muscle tissue gradually shrinks and weakens.
Meanwhile, inside the gut, things slow down to a crawl. Immobility decreases gastrointestinal motility, and as the stool sits in the colon absorbing water, this decreased gastrointestinal motility from immobility leads to constipation.
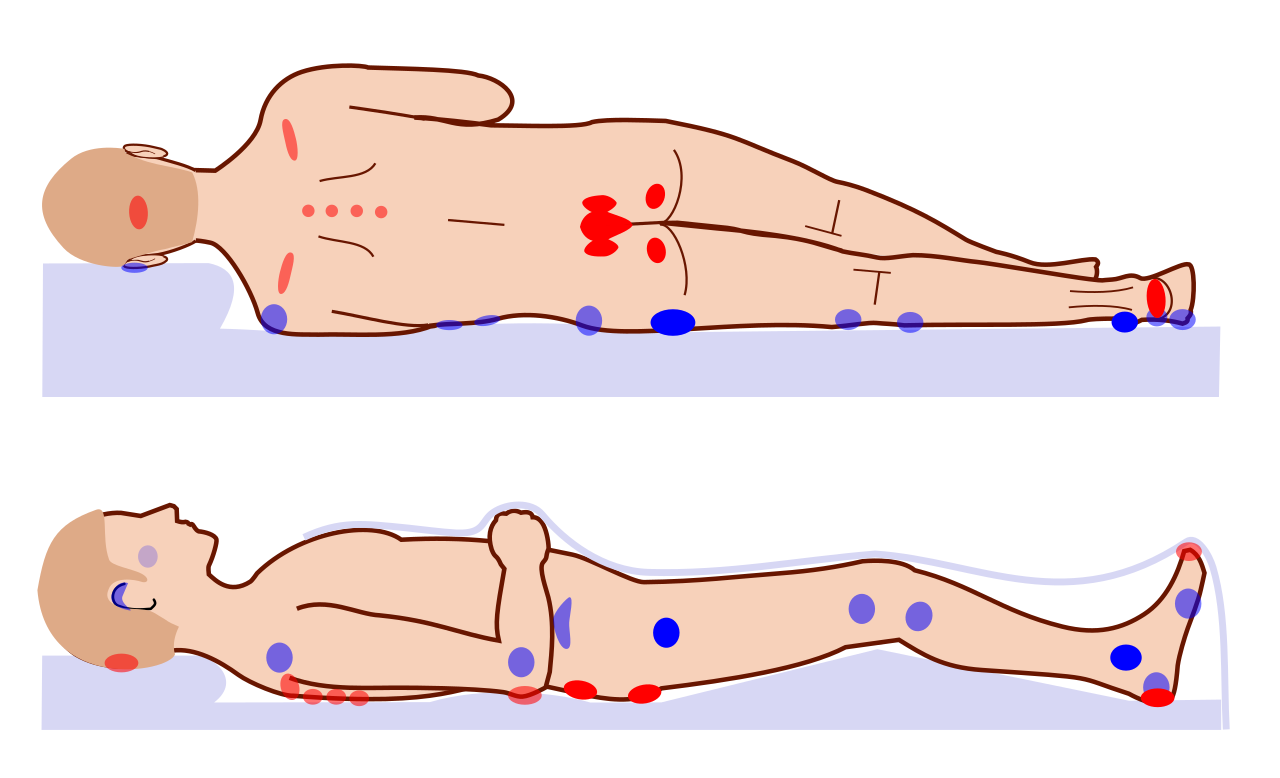
Finally, think of the skin. Sustained pressure on tissue from immobility leads to pressure injuries. The weight of the body pinches the capillary beds closed, starving the skin of oxygen until the tissue simply dies.
Common pressure points where sustained physical weight pinches capillary beds closed, leading to tissue death and pressure injuries.
To fight the decay of immobility, we use motion, mechanical assistance, and strict timing.
Defeating Pressure and Sheer
To prevent those devastating pressure injuries, we have a biological clock we must obey:
Nurses must reposition bedridden clients at least every two hours.
Nurses must reposition chair-bound clients at least every one hour. (Why faster in a chair? Because all the body's weight is concentrated on a much smaller surface area—the ischial tuberosities!).
When moving clients in bed, we never just drag them. Dragging rips the top layer of skin away from the bottom layer. Instead, a friction-reducing device decreases sheer forces on the client's skin during bed repositioning.
Special Case: The Logroll
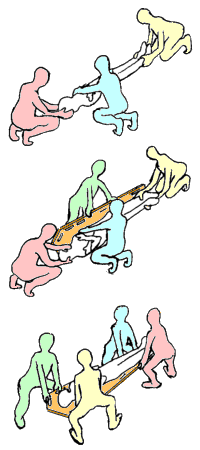
If you have a patient with a broken back, you cannot twist their spine. Clients with spinal cord injuries require the logrolling technique for repositioning. Why? Because the logrolling technique keeps the client's spinal column in strict alignment during movement. This is a team effort; logrolling a client requires a minimum of two healthcare workers.
The logrolling technique requires a team of health professionals to keep the client's spinal column in strict alignment during movement.
To fight off DVT, we need to artificially recreate the pumping action of the leg muscles. We do this in two ways:
Sequential compression devices (SCDs) actively squeeze the legs. These promote venous return, and this enhanced venous return from sequential compression devices prevents deep vein thrombosis.
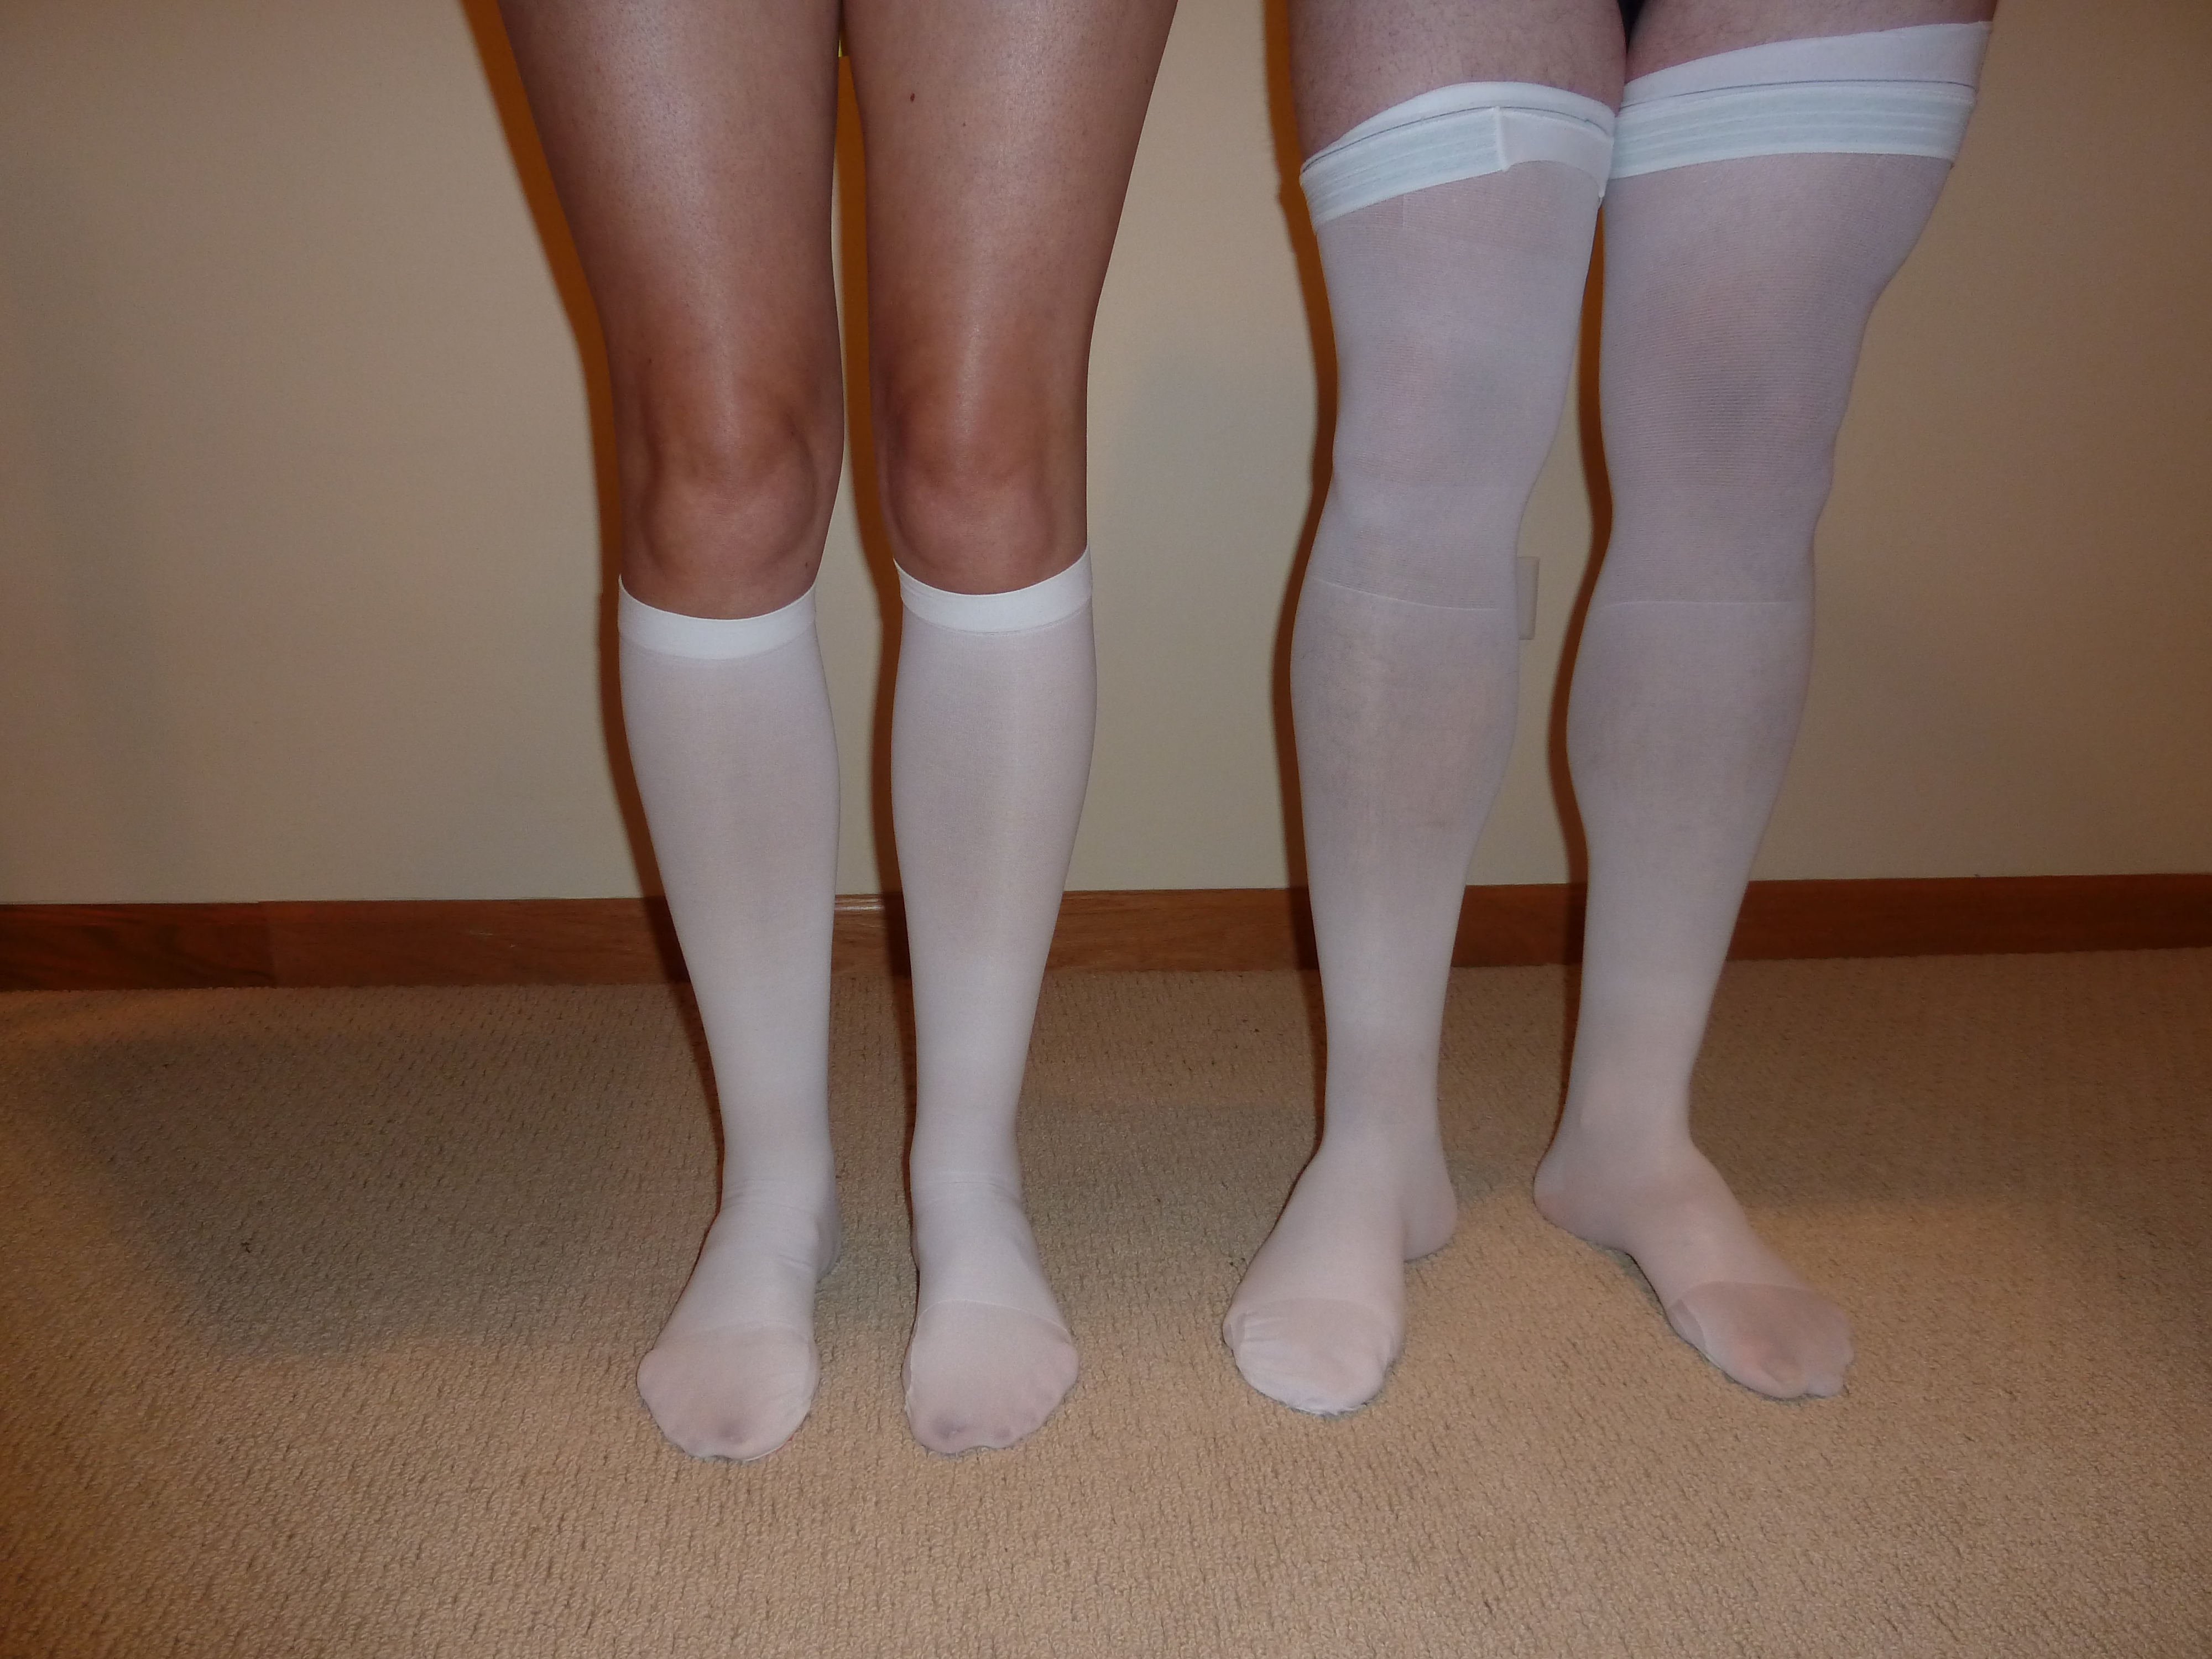
Anti-embolism stockings (often called TED hose) passively apply graduated pressure to promote venous return. But remember, they are tight! Therefore, nurses must remove anti-embolism stockings at least once per shift to assess the underlying skin.
Anti-embolism stockings apply graduated pressure to the legs to artificially promote venous return and prevent blood clots.
To protect the lungs, clients must perform deep breathing exercises to prevent atelectasis during bed rest. But the absolute best medicine for both the lungs and the blood is getting up. Early ambulation prevents respiratory complications of immobility.
Before that early ambulation, remember our lesson on orthostatic hypotension? We don't just stand them up immediately. Clients must dangle their legs on the side of the bed before standing to prevent orthostatic hypotension, giving their cardiovascular system time to adjust to the pressure change.
If a patient cannot walk yet, we must still keep their joints lubricated and muscles stretched through Range of Motion (ROM) exercises.
Active range of motion exercises are performed independently by the client. They do the work.
Passive range of motion exercises are performed by the caregiver for the client.We do the work.
When performing passive ROM, you must protect the structural integrity of the joint. Caregivers must support the joint proximally (above the joint) AND distally (below the joint) during passive range of motion exercises.
The Golden Rules of Range of Motion:
Range of motion exercises must be stopped immediately if the client experiences pain.
Range of motion exercises must be stopped immediately if joint resistance is met.
Joints must never be forced beyond their normal physiological range of motion limits.We are nurses, not interrogators. If the body says "stop," we stop!
When it is finally time to move a patient, physics is your best friend.
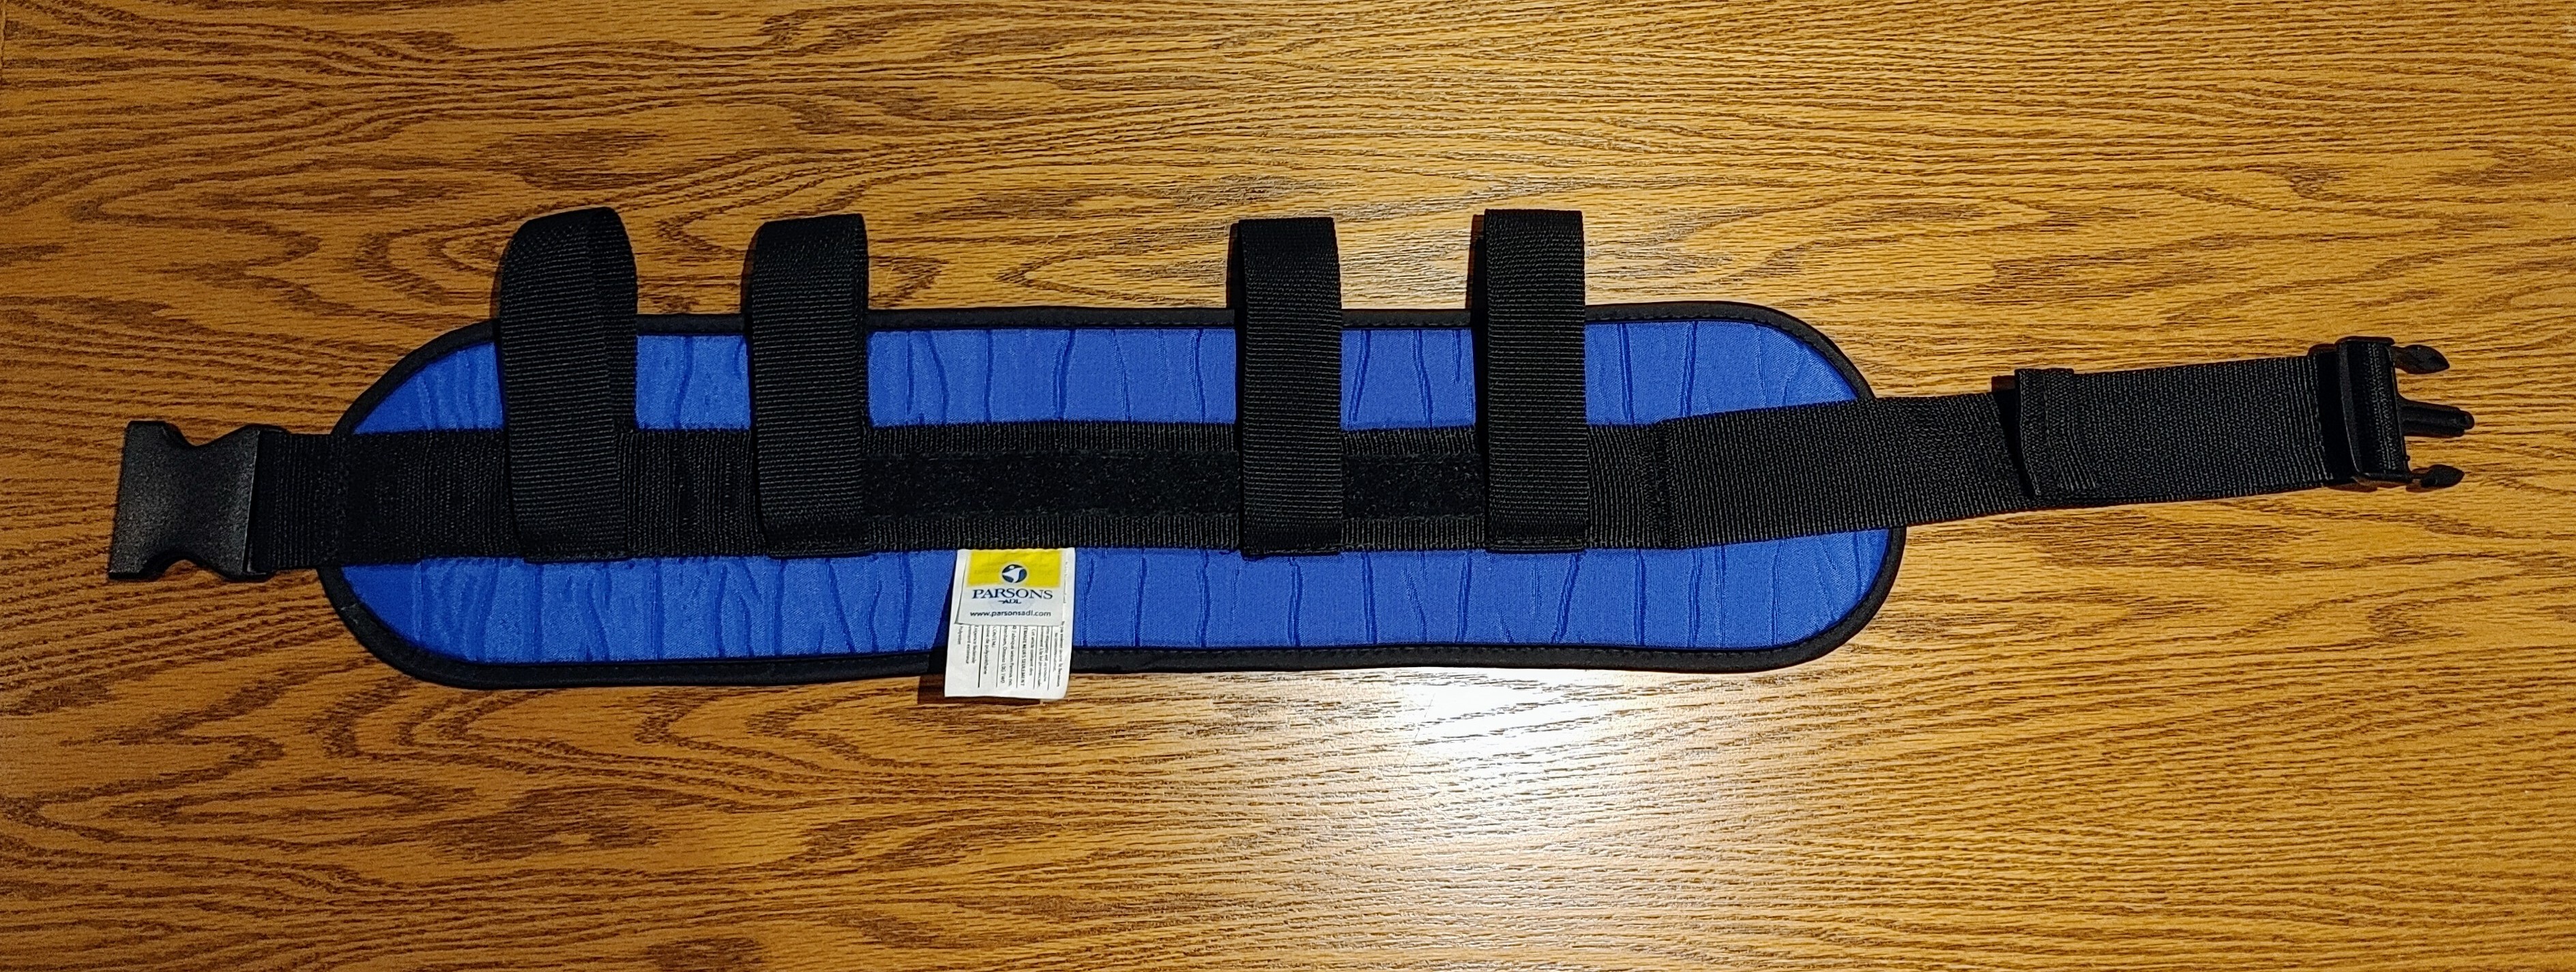
First, secure your center of gravity. A gait belt is placed securely around the client's waist prior to ambulation. This gives you a mechanical handle on the patient's center of mass. When lifting, the nurse must grasp the gait belt using an underhand grip during client transfers. An underhand grip locks your wrist and recruits your powerful bicep muscles, whereas an overhand grip relies on weak finger strength.
A gait belt secured around the client's waist provides the nurse with a mechanical handle on the patient's center of mass during transfers.
The wheelchair is positioned on the client's stronger side. This allows the patient to pivot on their reliable, good leg.
Crucially, the nurse must lock the wheels of the bed before transferring a client, AND the nurse must lock the wheels of the wheelchair before transferring a client. If you skip this, Isaac Newton’s laws of motion will push the bed and chair apart, and your patient will end up on the floor.
When a patient needs a little extra structural support, we give them extensions for their body. Let’s look at the correct mechanics for canes, walkers, and crutches.
Canes: The Third Leg
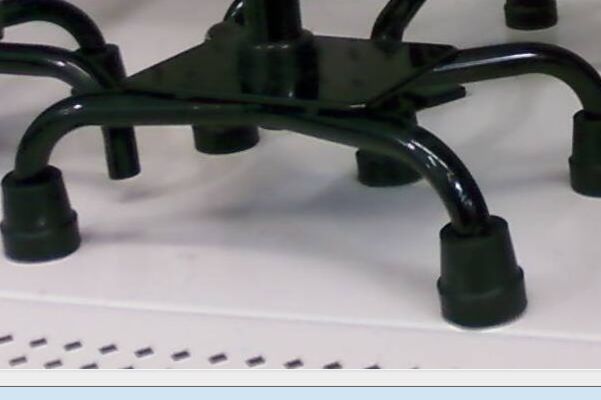
A cane widens the base of support. Quad canes provide a wider base of support than standard straight canes because they have four points of contact with the ground instead of one.
A quad cane provides a wider, more stable base of support compared to a standard straight cane due to its four points of ground contact.
Proper Fit:
The top of the cane must align with the client's greater trochanter (the bony prominence of the upper femur).
The client's elbow must be flexed at a 15- to 30-degree angle while holding a cane.
Proper Use:
Counterintuitively to some, a client must hold a cane on the unaffected side of the body. Why? Because as you step with the bad leg, your body weight naturally shifts to the good side. Holding the cane on the good side creates a wide, supportive triangle.
The Sequence:
When walking with a cane, the client first moves the cane forward.
After moving the cane forward, the client steps forward with the affected leg. (The weak leg and the cane now share the load).
After stepping with the affected leg, the client steps forward past the cane with the unaffected leg.
Walkers: The Mobile Cage
Walkers provide immense stability, but they must be sized and moved precisely.
Proper Fit & Positioning:
A client must stand in the center of the walker during use.
The top of the walker must align with the crease of the client's wrist.
Proper Use:
To ambulate with a walker, the client first advances the walker forward.
After advancing a walker, the client steps forward with the affected leg.
After moving the affected leg into a walker, the client steps forward with the unaffected leg.
Safety check:Standard non-wheeled walkers must be completely lifted off the ground to move forward. If a patient drags it, they will trip. Conversely, while wheeled walkers don't need lifting, wheeled walkers are contraindicated for clients who have unpredictable balance issues because they can roll away from the patient!
Getting up: Clients must never pull on the walker to stand up from a seated position. Walkers are light and will flip over. Instead, clients must use the armrests of a chair for leverage when standing up to use a walker.
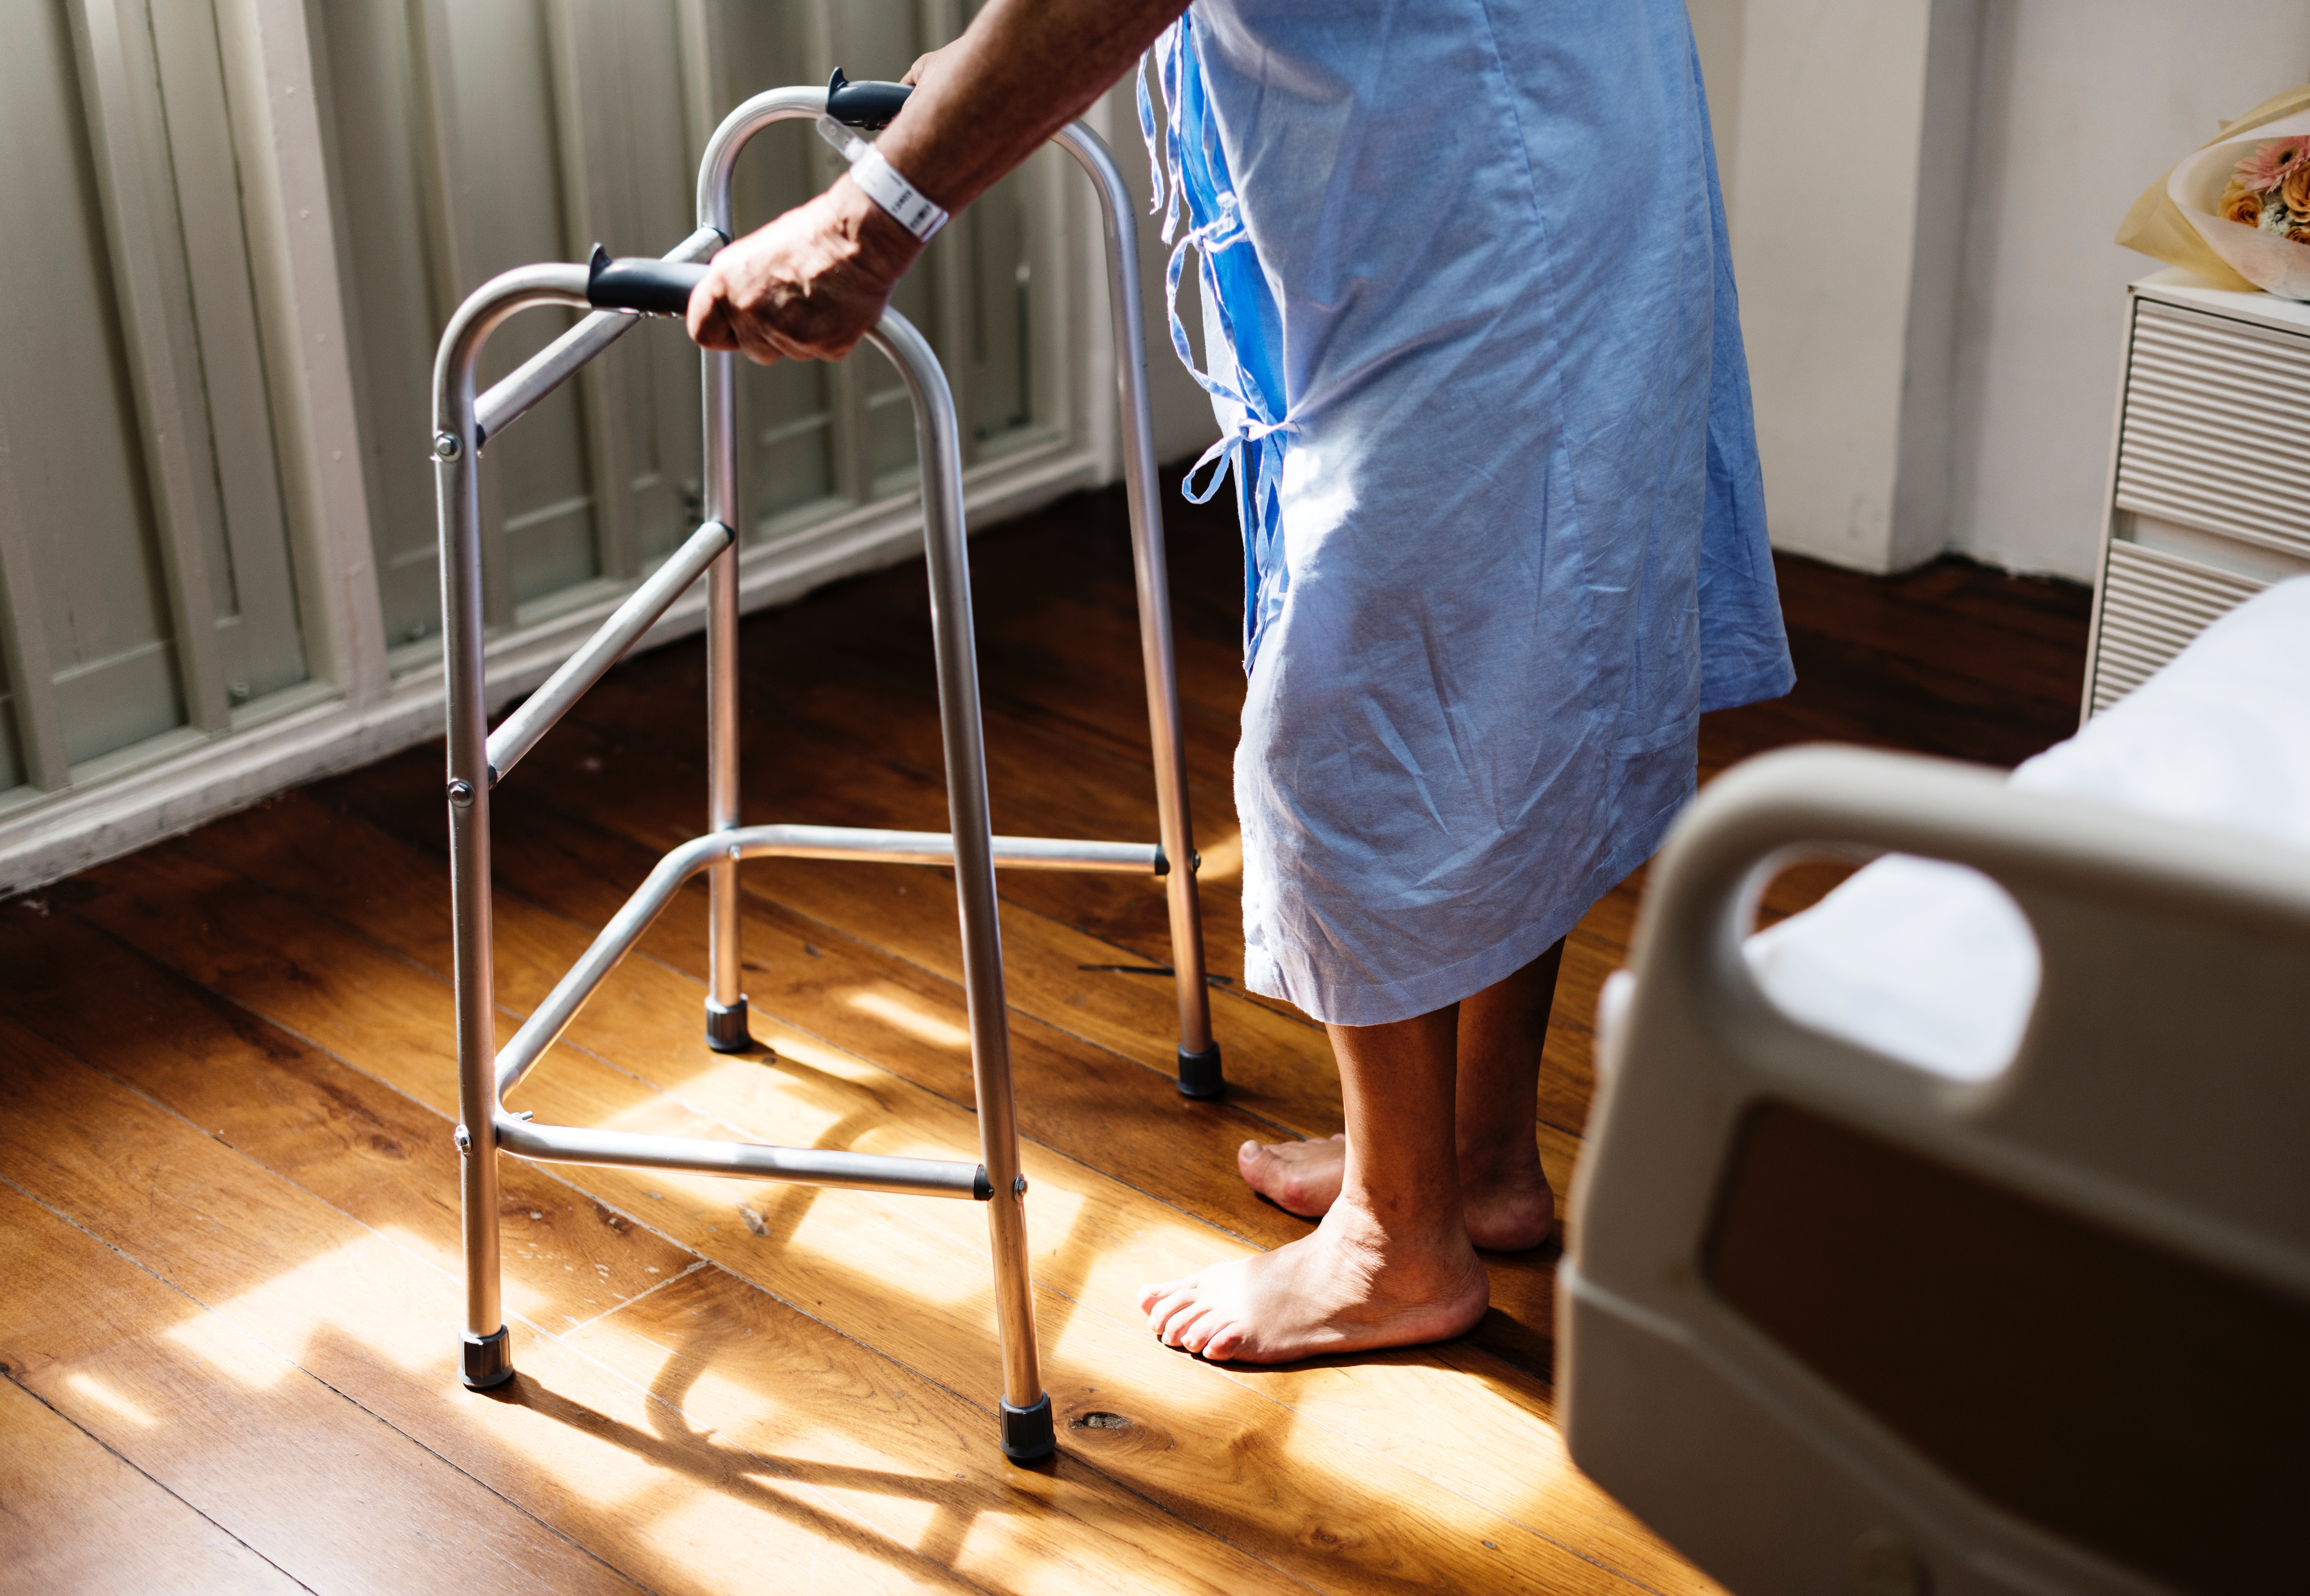
Standard non-wheeled walkers must be fully lifted with each step to avoid tripping, providing immense stability but requiring balance and arm strength.
Crutches require the most coordination and upper body strength.
Proper Fit:
Crutch pads must rest one to two inches below the client's axilla (armpit).
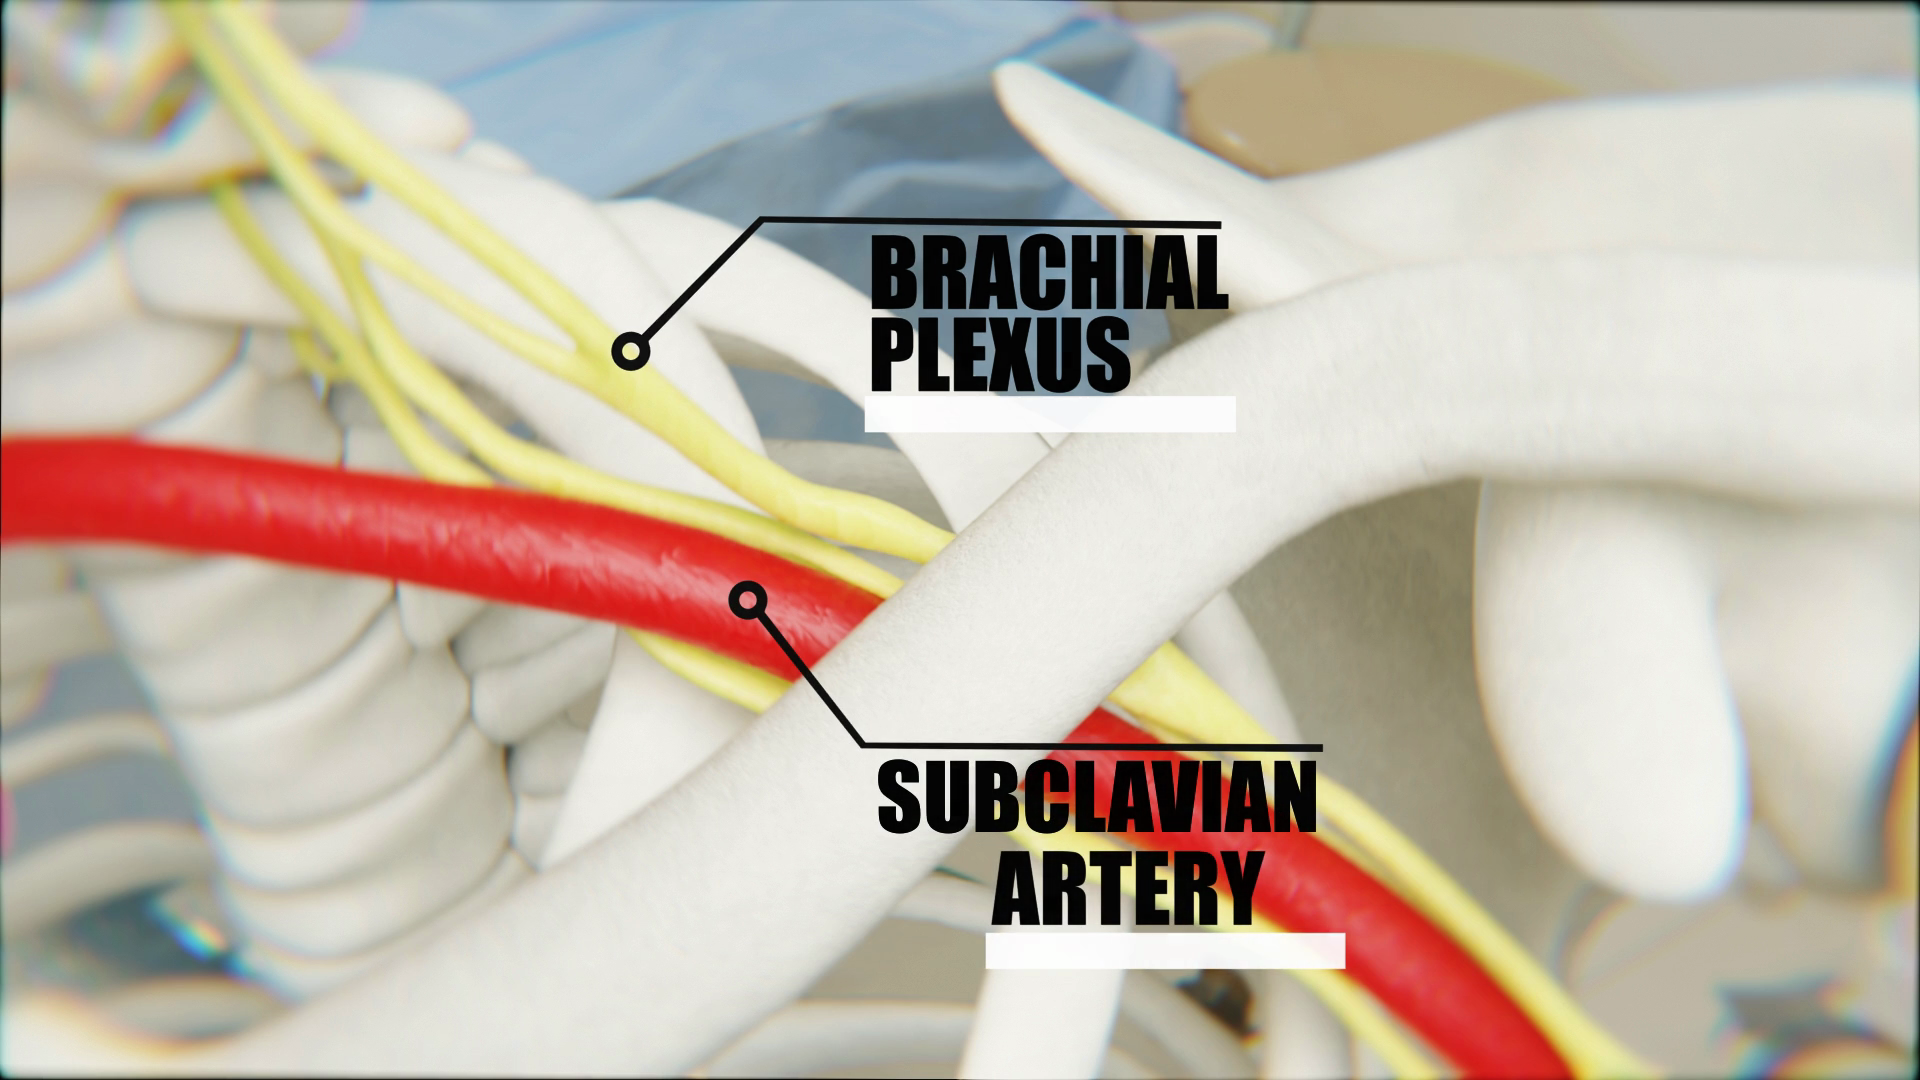
Why the gap? The axilla contains a delicate, beautiful web of nerves. Placing crutch pads directly into the axilla causes brachial plexusnerve damage.
Instead, clients must bear their weight on the hand grips of the crutches.
To ensure proper blood flow and leverage, the hand grips of the crutches must allow for a 20- to 30-degree elbow flexion.
The brachial plexus is a complex web of nerves running through the axilla (armpit). Resting body weight on crutch pads can crush these nerves, causing severe damage.
The Crutch Gaits:
Depending on their weight-bearing status, patients will use different "gaits" (walking patterns).
Gait Type
The Mechanics
Weight-Bearing Required
Two-Point Gait
The two-point crutch gait requires the client to move one crutch simultaneously with the opposite leg. It looks like natural walking.
Requires partial weight-bearing status on both legs.
Three-Point Gait
In the three-point crutch gait, the client moves both crutches forward simultaneously with the affected leg.
Requires the client to bear all weight on the unaffected leg. (The affected leg never touches the floor).
Four-Point Gait
The four-point crutch gait provides the maximum base of support. It is slow and steady. Sequence: <br>1. Begins by advancing one crutch forward. <br>2. Client moves the opposite foot forward. <br>3. Client advances the second crutch. <br>4. Client moves the remaining foot forward.
Requires weight-bearing on both legs.
Swing-Through Gait
Requires the client to advance both crutches simultaneously. Then, the client swings both legs forward past the crutches simultaneously.
Mastering Stairs with Crutches:
Think of stairs logically. When you go up, you want your strongest muscle doing the lifting. When you go down, you want your tools catching your fall. Remember the classic saying: "Up with the good, down with the bad."
Ascending (Going UP):
When ascending stairs with crutches, the client places the unaffected leg onto the upper step first. (The strong leg powers the lift).
After the unaffected leg is on the upper step, the client moves the crutches up to the upper step.
After the unaffected leg is on the upper step, the client moves the affected leg up to the upper step.
Descending (Going DOWN):
When descending stairs with crutches, the client places the crutches onto the lower step first. (Creating a safe landing pad).
After the crutches are on the lower step, the client moves the affected leg onto the lower step.
After the affected leg is on the lower step, the client moves the unaffected leg onto the lower step.
Conclusion
Understanding mobility isn't just about memorizing rules; it's about understanding the physics of the human machine. Keep the body moving when possible, protect its structural integrity when it's stationary, and always use your mechanical advantages when transferring or utilizing devices. Master these principles, and you'll keep your patients safe, strong, and walking out the hospital doors!